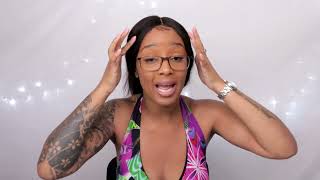
The Perfect Bald Cap For Wig Installs & Plucking+Defining Poppin Curls
- Posted on 18 September, 2020
- Closure Wig
- By Anonymous
SUBSCRIBE TO MY CHANNEL &
HIT THAT BELL
Follow my Instagrams
- @The.Bam
- @Artsofbamcraft
Hair From:
IG: @artsofbamcraft
DM TO SHOP
Detailed Plucking Tutorial:
https://m.youtube.com/watch?v=p0D0RWrF...
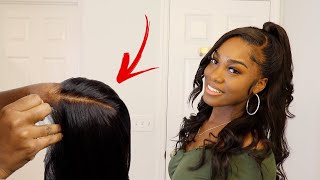
What'S up y'all, it's bam if you're new hi welcome to my channel and if you're not welcome back and i'm just going to jump straight into this video. So i'm starting off by plucking this unit, and i already have a detailed, full explanation. Video on how i pluck, and if you guys want to see that, then it will be linked in the description box down below, but y'all can basically just see what i'm doing. This is kind of like another tutorial, except that i'm not explaining. So, if you guys want to hear me, explain what i'm doing then that video will be down in the description box down below all i'ma say is where you see a lot of thickness at and a lot of density. That'S where you want to pluck, because you basically want to thin out your hairline, so this part is basically self-explanatory, so i'm just molding my hairline back with some hairspray and that's basically it like. I always do molding like this on my channel, so you guys get the gist of it and there's no need for me to explain this part. So y'all can just watch. How do you put the platform so after molding down my hairline, i'm going to start to define my curls now, so i'm taking some water in a spray bottle, and i'm also going to take some mousse and i'm going to put that all through my hair and Define my curls so just in case i was wondering i decided last minute to throw some cute little sideburns in this wig just to be different. Like i don't know, i was just doing stuff at this point, but i'm basically just taking sideburns from the sides of the wig and i'm molding them down with a hot comb and hairspray. So i'm basically going to let this dry for a full 24 hours and then y'all go see at the end, how the curls came out when they're fully dry. So moving on to the ball cap method, i took some got to be gel and combed. My edges back so my hair will not be in the way when i mold down my cap, so i'm basically just showing y'all the cap right here. How it looks i got a medium brown tan cap. I really don't know what color this is just no. It'S not my color, but i'm going to show y'all how to make the cap your exact color, so to secure your ball cap on your head. You want to take your got to be glue, free spray and also you got to be glue gel, and you want to do two layers of that and you want to place them where your hairline is on your head and basically just let it air dry. I mean you don't have to let it air dry, you can blow dry it or sit underneath the dryer. But when i do this, i prefer to let the cap air dry on my head. So after the first layer, this is the second layer that i'm doing with the got to be glue, free spray and the got to be glue gel. Just to let y'all know this part is optional. But i like to sew the back of my caps down because i like to protect my natural hair. If you guys don't know, i have natural hair and i just like to protect it. But if you don't do this part, then your cap will lift up in the back. So if you want to protect your hair and your braids underneath the cap, then i suggest you sew it down. So i'm cutting my cap with this eyebrow razor. I don't even know what this thing called, but i think it's called eyebrow razor or whatever, so i would rather use this than scissors to cut the cap because it just cuts way better. So you want to cut your cap in a zig zag motion. You don't want to cut it straight across because that's gon na i mean i guess it don't matter because it's the cap, but i prefer to cut my cap like messy and then like a zigzag motion, if that makes sense. But if you want to cut your cap or your lace on your wig, then use a eyebrow razor, because it's so much better so to make your ball cap blend and look super natural. You want to take your exact foundation, shade or makeup powder shade and just dab it on the cap. Like your exact shade, like you, don't want to use a shade above or shade below your skin tone, because it's just not going to look right. You want your exact makeup shade to make it look like super natural y'all go see at the end, and you also want your ball cap to look super natural, because, when you put on your wig, you don't want to be able to see the ball cap through The lace like you want it to look as natural as possible, so it can all blend nicely together. So this is basically the end of the video, and these are how the curls came out when they dried and everything, and this is how the plucking looks like everything just looks so nice, and let me know what you guys think about this butterfly headband. I handmade this headband myself and i'm thinking about selling them in different colors. So let me know what you guys think, and this is also how the install came out and if you guys want to install tutorial. Let me know down in the comments, and i will do that for you, but thanks for watching, like me,

Comments
Divine Blessings: Yesss install tutorial!! I can’t even see the lace on the picture even when I’m zoom in.Thank you so much I’m really learning a lot from you.
It’s Nae: The butterflies is nice asf, adding a lil razzle dazzle to the look ✨
Natalie M: Ahh I would love to have an install video! This was amazing xo
GoddessOG 444: Gurl this is everything ! The butterflies set it off
Alvonya Ellison: Love it boo. Amazing job!!!!!!!!
I’m her, Keisha: Yesss! Install tutorial please
Aijah: Can you pleaseee make a detailed video on how to melt lace , how to wash wig , and how to get lace wig straight?
lifewithshonti: omgggg myyy favvvvv person is backkkk missed ya boo !! bam is back yall!!✨!!big fan of you like fr.
SassyAggy: Love the headband
Sandra Johnson: Omg I love your videos ❤️
Foreign Floran: YES MAKE A INSTALL VIDEO
Anuli N: Please can you do a video on how to pluck a path?
Shauna Thomas: Do you sale this hair? Where can I get it from?
Nya Bella: Amazing
Still Prettyyy: PREFECTIONNN
Myiah Boo: What's the outro song
It’s Nae:
Jade Gordon: Install
Sensuu Harm: the name to the intro song
Rashyia: First comment I think