*New* Easy Lace Melt Method For Beginners | True Scalp Tape Side Part Hd Lace Install | Hairvivi
- Posted on 03 January, 2023
- HD Lace Wig
- By Anonymous
#lacewig #hairvivi #install
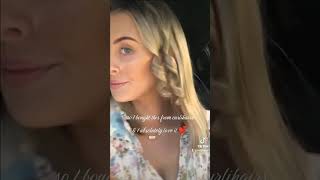
THE MOST REALISTIC WIG INSTALL! I'm falling in love with blowouts and wigs that look like scalp. Hairvivi has done it again. Here are my tips and trick to install your hd lace units without using glue while introducing the new "True-Scalp" Tape. I love it!
I tried @BeigeOjai new lace melt install with a sponge. Loved the results!
♡ Watch in 1080 HD & Subscribe: https://www.youtube.com/forevercryssy
$30 OFF DISCOUNT: Cryssy (No Time Limit)
▬▬▬ WIG DETAILS ▬▬▬
Wig in video: https://bit.ly/3G3K8qh
Hair Length: 20 inch
Hair Density: 160%
HD Lace & True-scalp Color: Cappuccino
Capsize: Medium
▬▬ NEW WIG ERA▬▬
-True-scalp Tape & Fake scalp Method
-Multi-color & Invisible HD Lace
-Anti-slip Elastic Band
-Clean bleached knots
-Pre-plucked Hairline
▬▬▬ MORE WIGS FOUND HERE ▬▬▬
▶ Best Seller #LaceFrontWigs: https://bit.ly/3BMuHR2
▶ Hairvivi 13x6 #HDLaceWigs: https://bit.ly/3wwVwGg
▶ Hairvivi Official Website: https://bit.ly/3sLvGNT
▬▬▬▬ Hairvivi Social Media ▬▬▬▬
Instagram: https://www.instagram.com/hairvivicom/...
YouTube: https://www.youtube.com/channel/UCWK7J...
TIKTOK: https://www.tiktok.com/@hairvivi.com?l...
Facebook: https://www.facebook.com/hairvivicom
Pinterest: https://www.pinterest.com/hairvivi/_cr...
▬▬▬▬ MUST WATCH ▬▬▬▬
1. PLUCK LIKE A PRO: https://youtu.be/ouFJOAfWqWE
2. BLEACH KNOTS: https://youtu.be/nHxDaQWG9Tk
3. DETAILED INSTALL: https://youtu.be/583UXwGE4Hs
4. WAVY BOB: https://youtu.be/NRrgdRvpXTQ
5. SIDE PART BOB: https://youtu.be/XI_ZDURLc5o
▬▬▬▬ PROTECTIVE STYLES ▬▬▬▬
MY FAVS:
1. PASSION TWIST: https://youtu.be/7wMA_Qv2zjg
2. CURLY FRO: https://youtu.be/j8xHgc3ibys
3. NATURAL SIDE PART QUICKWEAVE: https://youtu.be/DIVAPv5YFX0
4. V PART + LAYERS : https://youtu.be/RYjHnb7-CBo
5. VERSATILE WEAVE: https://youtu.be/sRG_dfskG_4
6. KNOTLESS BOX BRAIDS NO BABY HAIR: https://youtu.be/vD14SlCCEuQ
7. BANTU KNOTS: https://youtu.be/JAbafgqWAUs
▬▬▬▬ ForeverCryssy's Social Media ▬▬▬▬
@ForeverCryssy
INSTAGRAM: https://www.instagram.com/forevercryss...
TWITTER: https://twitter.com/forevercryssy?lang...
TIKTOK: https://www.tiktok.com/@forevercryssy?...
TRILLER: https://triller.co/@forevercryssy
▬▬▬▬ Shop HERE ▬▬▬▬
♥ Business Inquires: [email protected]
♥Website: https://www.forevercryssy.com
♥Amazon Store: https://www.amazon.com/shop/forevercry...
FAQS:
Location: Atlanta, Ga
Height: 5'2
Main Camera: Canon T7I
Vlog Camera: Canon g7x Mark III
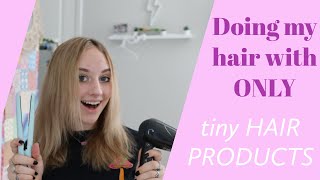
Hey babes, jumping right into the video y'all know when y'all see here. Vv just expect the best all right at this point. Y'All already know that their packaging is superb. They give you step-by-step instructions on what it is to do to actually install the true scalp tape, which is one of my absolute favorites. It'S completely replace my wig cap, so if you don't feel like bleaching the knots and going through that whole process highly recommend, even if you can't get you a unit right now right, you kind of need to put the coin away, definitely make sure that you purchase Some of their true scalp tape, which is available on their website, and there will be all of the links Down Below in my description box. Of course, if I can get y'all some coupon codes, because I know their units are a bit pricier but keep in mind the quality that you guys are getting, I still have my very first hair Vivi unit from 2017.. Okay, let's get into that. If you are new here or welcome now's a good time to go ahead and subscribe, you guys can see I'm using their or where there are 13. I can't talk. This is going to be the be there in plastic unit and, of course, y'all. I'M excited to put it on. This is actually Victoria Park unit wow, you guys can see. My hair is already braided up. If you need a cornrow tutorial, you all know. I got the tutorials for you, okay for the Lolo, all right. It'S actually free just go ahead and make sure you go through my playlist to check that out. I'M actually going to go ahead and show you how to step by step, install the true lace, uh, true scalp tape. So if you guys are new here - and this is your first time actually seeing me - do this - then uh yeah enjoy y'all. Okay, it's really really simple. All that I did was pretty much just cut it out of the packaging you guys can see. It comes in like two different colors. I will recommend them, maybe in the future providing a few more shades. Obviously we come in all different shades, but this is uh my shade. It actually matches perfect to me. So no complaints here you guys, can see just how everything looks through the grid lines. They almost disappear and once you actually put this on your scalp, you guys will see what I mean so and so of course, here I'm just pretty much uh. Creating this curved shape, when I've done this for the very first time I kept it kind of in its original form, with that straight across. I guess like shape in a square, and I did not like the way that I could still kind of see it peeking through the lace, so I decided to go ahead and just kind of curve it. I think I saw another YouTuber do it. If I can remember her Channel, I would definitely give her her credit um, but yeah, so you guys can see just how easy it peels off. If you do not want to cut the true scalp tape, you can absolutely go ahead and place it about a half. An inch behind the hairline, because you don't want it to be directly in front and you guys can see just how it literally Fades away. Look at that boom. So imagine this on your actual scalp and so again, if you do need to just go ahead and like lay that across the wig cap, it's not going to hurt it at all. You don't have to like make this super precise and match it up with the size of the lace. Y'All, don't do the most. Okay, just make sure that it's about a half an inch behind the hairline and you guys can see putting it on y'all know. Hair Vivi creates units that fit like a dream. The biggest thing here is for you to always - and I mean always try to install your units gluelessly by glueless. I literally just mean that there's no glue right so sometimes we'll use a little bit of Pump It Up. Y'All know the got ta be glue. Had me in the choco for years, but I found that it was just a little bit too sticky, so I'm hoping hair BB maybe comes out with a spray or something to go along with their unit so that we can really really kind of bump it up. A notch, and then, of course, I'm just pretty much, taking a look at what the unit looks like. So all of the specs will be listed down below I've heard. Sometimes you guys are like we don't always get the same density so definitely make sure that when you're ordering you are doing it just like, I did and I've recently come across this video um. I believe it's beige oja. If I'm saying her channel right - I I'm not sure, but anyway, I will link her Channel Down Below. She actually did this method where she installed her unit using a beauty, blender and then, of course, just some hairspray to avoid all of that spray getting everywhere all over your face. Y'All know how it can be, so all that I did was literally dampen up. My sponge, just to kind of get it moist and kind of full, and then I went and hit it with the pump it up spray, and you guys saw that I just dabbed it around my hairline. I did that about two to three times before pulling down the wig and then, of course, once it was pulled down, I used the sponge again just to go over the tops of the actual hairline and I'm using the comb to make sure that none of that Pump it up actually gets like really sticky. So if you guys are wondering this doesn't look like the typical Pump It Up, This is their professional line, but don't worry if you can't get access to the professional line, because you are not a professional, then definitely the regular Pump It Up will do just fine. So here I did not want to over customize. I did not pluck this out any further. It does come pre-plugged pre-bleached, all that good stuff. I should have actually maybe either move the wig a little bit back further or really really got into it around the ears. But y'all know whenever I do these videos, I want to make this as beginner friendly. So if you are not someone that is a pro and knowing how to really customize these units, hair Vivi is a really great place to start um and so yeah. I just really like the shape of their hairlines. I'M liking the way that the lace is just kind of easily coming off. You guys can see just how quickly the hair dry or the hairspray dried, and so y'all was a little bit tough. Trying to cut this off that pump it up is no joke. Okay, I did notice that I had a little bit more extra lace, so I ended up cutting that off later on in the video. You probably won't notice it here. The only thing that I will say is this hair had to have been pre-colored, so it was really really dark, but it was still like about a nice dark brown closer to like a 1B um, and I did notice that some of that color kind of came Off on to the sponge as well, so I'm not sure about that that was kind of new for me um but yeah. Nevertheless, I always recommend that you guys wash and kind of pre-style your units on a mannequin head, allow it to dry before installing, but y'all know for the sake of the video for all my beginners out there. I want to show you step by step fresh out of the box, what to do so that you guys know I am not doing anything different than what the company is providing, because I know sometimes I just know what it's like. Okay, you guys give me those comments and I'm like y'all. I absolutely love hair VB. I would not bring you a company if I had not tested the product love the customer service love the shipping, the entire experience, so I did notice that the density on this was a little bit thinner than I'm used to not when I say thinner, it's literally Literally, just less dense than I'm used to not that it was thin. I thought that this density was perfect. If you are somebody that wants more of a natural feel, but y'all know when we do the really really long hair a lot of the times. I do want this to be a little bit more full than normal, especially when I'm going to be doing the curls, and you guys can kind of see here what I mean. Eventually, I will kind of decide to do a mini chop, so once we get into that part, you guys will see that I always recommend taking a hot comb. Um y'all can find this on. My Amazon store Beauty Supply Store pretty much anywhere y'all. That will be a one-time buy and you will have it forever. I don't recommend using it on your natural hair, because that temperature is a little funky y'all know, but I did go ahead and use my EAP heat flat iron just to go through pretty much. All of the hair add some nice little curls and they actually ended up coming out like um the Goldilocks curls like I don't even know what to call those, but I must have really been twisting my arm because they were super curled on itself and you guys The unit already comes pre-styled like I was in love with the way the bangs looked, but I didn't know how to mimic the curl using the flat iron, so there's that Chrissy mess up sometimes too all right, I'm just going through you guys, can see. I kind of tied it down with the elastic band you don't really have to, but I like to do that when I'm curling just to make sure that, when I'm kind of tugging on the hair, my weight is not lifting up and redoing or undoing what I've Already done so, there is that um, all that I'm doing now from this point is I'm going to go ahead and add a little bit more face face framing layers just to kind of blend out. One part, I'm not sure that I left this in the video. Just because I have so many videos showing you how to layer the hair, how to really kind of get it the way you want it to look. But I do remember just adding a little bit of extra vava boom up in here. So I'm taking a wide tooth comb. This is just like I don't know, and then my paddle brush just to kind of go through all the hair, see what the curls are doing. What is it that I needed to fix? I could absolutely see that the hair just literally needed shape it's not that a lot of the times. You know you'll curl, your hair and you're like Girl, My Curls did not come out like yours did, but a lot of the times. It'S not necessarily that you can't curl your hair, it's just that it needs some shape. Hair cannot just go, you know and curl the way you want it to without having some type of layering so that it can sit upon itself unless you're going for like a really long, uh wavy. Look. I could imagine that, but yeah no for the most part, it's not going to work out, so I was trying to figure out what it is that we wanted to do with these bangs. I don't know I should have like repositioned my part, because I wasn't really caring for it, but y'all know I had to commit because we're already here so y'all. Let me know in the comments if so far, y'all are loving them. The hair was soft. It was full I did get some shedding, but of course that was just because I trimmed everything around my ears and the hairline and most of the times when I trim behind my ear, I make a mistake and cut a lot of the hair off and so Of course, this is pretty much a good look at what the hair was looking like. I did go ahead and add a little bit of the Broner Brothers uh professional oil, just to kind of go all throughout the hair. This is like a light holding spray. It'S called Diamond Shine, I like it, I mean it's doing what it needs to do. The hair already had a beautiful luster and, like I said, I didn't go too crazy with the layers, but I did add just a little bit to kind of help frame. My face and add a little bit more of that. You know, look that I was going for. I wanted to look really soft natural but still voluminous, and I think we achieved just that y'all. I was obsessed with this bang. Now you guys will see what it is that I'm talking about when it comes to the fullness at the bottom. For me, I just wanted this to be Fuller. I don't know what it is. It'S not that it looks bad, but I just really really wanted this to be Fuller, so because of that, I decided that I was going to go ahead and add a little bit more shape to it. So this is what the back looks like so cute. Had this density been taken up a notch y'all and we would have been in the game - okay and not to mention y'all, know. I'Ve been obsessed with pulling my hair up into the little claw clip. I don't know why. All of the 90s early 2000s Trends are kind of coming back around, but I'm loving it because y'all know that's where I thrive. Okay, so I did go ahead and just kind of give y'all a look, real, quick and actually, usually, I complain about the back of the wig. There is hair all around the back of the unit, so if you need to pull it up, you can, if you want to throw on a hat and go lately, I've been doing the beanie thing, um and then, of course, y'all see. I did go ahead and do a big chop so that the hair just looks fuller. It'S not that it wasn't full, but y'all know how it can be the longer the hair. Sometimes if it's not full from root to tip, then there is just like. I don't know we needed to balance it out, so I did go ahead and do a nice big chop and then I just prefer the way that this looks a whole lot more just because it was full the whole way around. So it was kind of giving me like that long, bob vibe, to where I could really do some like blowout curls. When I set this into a middle part, because y'all know I will be reinstalling these typically, I do a wig cell, but my hair BB units. I got ta keep them for myself all right. These are my favorite favorite. If I was going to be doing A Wig Company in the near future, it would be very similar to the structure that hair BB has just because starts to finish. Effortless. I love it. You guys can see so I'm definitely curious to hear from you. I love you guys so much leave any comments or questions down below stay pretty, and I will see you in my very next video which is probably coming tomorrow: bye, y'all, foreign
Comments
Emeth: I love what you did to this wig. It is gorgeous.
Ashley's Spice Kitchen: Perfect!!!
Vanessa Harvey: love it. True scalp tape yaaasss melted like butter
ltlmma: I wish they made it with the part on the left side.
DNE HAIR: Can we collab?