Making A Bob Wig From Scratch, How To: Make A Bob Wig Using Braiding Hair
- Posted on 26 September, 2022
- T Part Wig
- By Anonymous
Hi Loves,
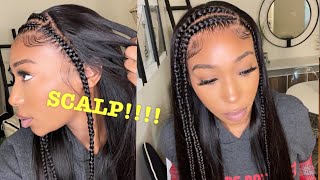
Todays video is about how you can make Bob Braiding Wig using Expression braiding hair.
.
.
.
I hope you like it, Please do well by subscribing to the channel and drop a comment at the comment section cause it help the channel grows.
Thank you for watching todays video i really appreciate your time spent on my channel
Follow me on
Tiktok: Abigail Ifeoma 7
Facebook : Abigail Ifeoma
Instagram : Ossai2ossai
#howto #locks #naturalhair #naturalhairforblackwoman #shorts #youtubeshorts #locks #shorthair #fyp #braids #fyp #braids #wigs #braids #braidstyles
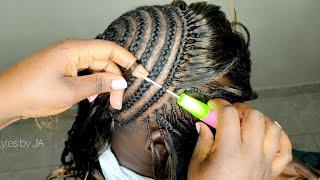
Hey fam welcome back to my channel. Thank you so much for stopping by if you're new. Here you just seen my video for the first time my name is Abigail ifeoma. Thank you! So much for stopping by so today I'll be showing you how I made this week simple and easy. Please keep on watching. So the first thing you'll be needing is your wig cap? That'S your next you'll also be needing your brush to brush the extension. Your scissors for trimming your crotchet, pin your needle and thread tipping and your air cream, I'm using expression products for the braiding hair. So I'm going to start by putting the wig cap on the dummy's head first and secure it with my T. Pins foreign took it out from the park, and this is how it is. So. What I'm going to do is to divide the hair into two parts. After dividing the air into two parts, I'll work with the smaller section, because I want the back side to be shut, since it's Bob I'm doing so right now, I'm going to cut it into seven parts. So here is how it is. This is cotton, seven. So the next thing I'm going to do now is to stretch it as you can see. So after stretching it I'm going to apply cream and brush it with so I'll brush out the excess air to just to make it smooth so but before then, I'm going to apply air cream to make it more smooth foreign, and I know it's ready when it's Ready, of course, you will know because it's going to be so smooth after brushing, so I'm going to start by crocheting. The egg first thing I'm going to do is to pass the crochet pin through the neck. Take a little bit of my extension hook, it on the crochet pin and then pass it out from the other side, I'm going to pass one side of the extension after doing that, I'll take another portion of air and start braiding the air. So when I braid to my desired length, which I want it to be at the neck of the dummy's egg, so I'm when I get to that side, I'm going to stop and tie a knot. So right now, I'm going to start by passing the crochet paint through a net. After doing that, I'm going to take another section of air and start braiding I'll braid until I get to my desired length after that, I'm going to tie a knot. I'M tying a knot just to secure the braid, because I don't want it to loose before I finish, making the whole of the air foreign foreign. At this point, I'm just going to start crocheting the air I'll crochet it all over where the candle is and then starts after crocheting it I'll just start Braiding on them. Welcome once again to my channel. Thank you so much for stopping by if you're new to my Channel or you just seen my video for the first time my name is Abigail ifeoma. Thank you. So much, please do well by hitting the like button subscribe. If you haven't and comment down below, let me know what you think about the week after watching and also please let me know if you any Esther, you want me to do next I'll, be so happy to do that. Thank you. So much like, I said, don't forget to subscribe. If you haven't foreign foreign, the back side right now, I'm going to be using a closure for weeks for this center part. So what I'll do is to place the closure on at the middle part and secure it with my T pins, so I'm making sure that it's on the center part of the wig cap, that's the next, I'm just making sure it's at the center part and then Secure it with my needle and with my zipping after doing that, I will go ahead and sew it. So I'm going to sew it twice with needle and thread and then cut out the excess weakness under the closure. So just watch and then you understand, like I said, please don't forget to subscribe. If you haven't, please like this video because it helps my channel I'll see you guys in my next one. Thank you so much bye, foreign foreign, foreign, foreign foreign, thank you, foreign foreign foreign. Thank you, foreign

Comments
Vera J hub: This is really beautiful
Owonifari Bolanle: Can I put it inside hot water ma