Wig Installation For Beginners | How To Install A Wig | Got2B Glued | How To Make A Wig Look Natural
- Posted on 18 March, 2021
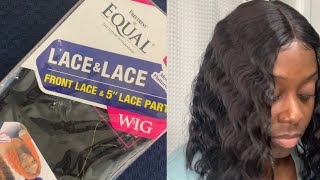
- T Part Wig
- By Anonymous
Hey Guys! So, I'm back with another video! Today we are going to learn how to install a wig. I know I have done this video in the past, however, ever since starting this channel I have been wearing wigs more and more and I feel like I am much better at explaining things than I was when I did the original one and why not do it again for all the new people who have joined us. Wig installation for beginners can be overwhelming! We are using Got2b Glued Spray is great for installing a wig for beginners! I have worn so many more wigs since that first video and I’m back to show you how to throw your wig on, make it look more natural, and keep it moving. This is my How to Install A Wig 2.0! How do you install your wigs? Let me know in the comments below.
~ Jesse M Simons ~
THINGS I USED IN THIS VIDEO
Got 2B Glued Spray - https://amzn.to/3cP4IMG
Got 2B Glued Glue - https://amzn.to/3bZ8DHw
Wig Hair Band - https://amzn.to/3tBhi91
Wig Caps (Beige) - https://amzn.to/3bWC3Wq
Wig Caps (Brown) - https://amzn.to/3cFW2bm
**Follow me on**
IG: @Jesse_M_Simons
Facebook: https://www.facebook.com/Jessemsimons
Email: [email protected]
*These Are A Few Of My Favorite Things (Wigs)*
Lace Grip Cap - https://amzn.to/3snbsqC
Got 2B Glued Spray - https://amzn.to/3cP4IMG
Got 2B Glued Glue - https://amzn.to/3bZ8DHw
Blade Extreme Hold Spiking Glue ( Cheaper Version) - https://bit.ly/3eXa3nP
Amika Silken Up Dry Conditioner - https://amzn.to/3fjlZ3d
Amika Silken Up Dry Conditioner (Travel Size) - https://amzn.to/3ehsl16
Aussie Sleekend Warrior Dry Conditioner - https://amzn.to/3w34nhV
Wig Brush: https://amzn.to/2QQDxcW
Wig Wall - https://amzn.to/2RcM1Lv
*These Are A Few Of My Favorite Things (Makeup)*
Milk Makeup Mini Hydro Grip Setting Spray - https://amzn.to/30HgDGw
Mini Fan Air Conditioning Blower for Eyelash - https://amzn.to/38D3XVu
Eyebrow Scissors - https://amzn.to/3fQgQQs
Kabuki Brush- https://amzn.to/3gdT7di
HiMirror Slide: Smart Makeup Mirror - https://amzn.to/3amBKDc
Cosmetic Makeup and Jewelry Storage - https://amzn.to/3aqon4Z
HiMirror Mini Premium X 64GB - https://amzn.to/3dCEYEP
*Other Videos You May Like*
How To Highlight A Synthetic Wig - https://bit.ly/3ekXYqj
How To Wash A Synthetic Wig - https://bit.ly/3dE7k1r
How To Pluck A Wig - https://bit.ly/3ncwqrs
How To Make A Hard Front Wig Look Natural - https://bit.ly/3sI5iBw
Wig Basics 101 - https://bit.ly/3sFqEQf
Hi guys today, i'm going to be showing you how to install a wig all right. So i wanted to come on here and i wanted to kind of revamp an old video that i did when i first started this channel and that's really just how to install a wig. I wanted to show you step by step with a product that works really well to kind of. Actually, i'm going to use the word glue your wig down, but we're not actually gluing anything with any type of actual adhesive glue. This is going to be more of a hair gel and a hair spray that we're going to be using. So before i install this wig, i just wanted to say a couple things um. If you are new to my channel, don't forget to subscribe, make sure you hit that notification bell to get notifications on all the videos i do in the future. I always do wig videos every wednesday and i really try to do a lot of tips and tutorials for you guys and if you find value in this video, make sure you give me a like i'd, really appreciate it. And now we got that all out of the way: let's go ahead and install a wig, so the things you're going to need to install your wig is obviously the wig you're going to be installing you want to make sure you've cut the lace on your wig. I can go ahead and link a video i have above on how to cut the lace off of a wig when you get it in, but this one is already cut and ready to go. So you want to make sure your wig is cut and then you're going to need a couple things so you're going to need got to be glued spray, which i use all the time in a lot of my videos. This stuff is amazing, awesome for wigs and it's not made for wigs, obviously per se, but we're all about using things that are used for other things to do things to our wigs. That was a lot of things i threw in there, but this got to be glued spray is a must-have i feel like if you're going to be wearing wigs at all and then the other thing we're going to have is this is actually the generic brand, but Got to be glued makes a extreme hold spiking gel, so this is actually cvs's brand, which i bought, because it's exactly the same formula. It'S just a little cheaper and i'm all about a bargain. So i bought it to try out - and i have not noticed a difference, so i usually buy this one and a bottle lasts you forever, so i probably won't have to buy another one for a year. So these are definitely the two things you're going to want to have to install your wig. I also recommend putting either a wig cap or a wig grip on your head. I find when i'm actually gluing down a wig, that it works better. If i use a wig cap because the only problem with a wig grip is, it adds a little bit more height, which causes a little bit more of a gap between the lace and your forehead, which makes a little bit harder to glue it down. So my recommendation is to use a wig cap, but if you want to use a wig grip instead, because you feel better about using a wig grip, that's totally fine it'll still work. You might just have to give it a little bit more glue just to make sure that it stick down the way you want it to, but so for this purpose, i'm going to be using a wig cap. The other thing you're going to want to have is something that you can put around your head. Once we get the wig on anything that you can get really tight, so i'm going to be using. This has velcro on it. You can use a scarf. You can use a bandana, you can use a headband, that's stretchy anything you're, going to be able to put on it's going to feel tight and secure, because that's going to help hold the wig in place. While we let it set or while we let the glue dry and then the last thing you're going to want to have - and this is just an added step - if you really want to make that part - look more natural and make the wig look more natural. On your head is you're gon na want some concealer, so those are the things you're gon na need nothing crazy. So i'm gon na go ahead and grab a wig cap. I'M gon na put that on my head first, because that's always the first step all right. So once i put my wig cap on, especially if i'm going to be installing a wig, which means i'm going to be wearing the wig all day and i might be able to lift it or move it around, i always like to take this got to be Sprayed here and i like to spray it right on this edge, so where you see, if you look at your wig cap, it has like a thicker band right here. I go right behind that and i spray all across and that kind of helps kind of stick. The wig cap to my hair and it's totally safe. This is made for hair. It'S just like a really strong, strong hairspray. The only thing i will say is: when you go to lift the cap off, i recommend taking a little bit warm water and just dabbing. It on the cap first and then pulling it off because you don't want to like pull it and it'd, be so stuck to your hair. That it kind of you know, makes a scary ripping sound shouldn't, pull your hair out, but still that can be scary. I just let this dry a little bit just to make sure that that's gon na stay on my head and you're gon na know. You have enough because it's gon na look like kind of translucent and then as it dries. The translucentness is gon na go away. You don't have to wait for this to dry before you put your wig on your head, but if you feel more comfortable waiting just to make sure it stays where it needs to stay, you can absolutely do that. I'Ve done this a couple times. I feel confident enough to leave it on there, while it's drying and put it on my head, i'm not worried about it moving anywhere. If you don't feel comfortable, throwing your wig on right afterwards, just let it dry. First, it's gon na be stuck where you put it, and then you can put your wig on so the next thing we're gon na do before we install this wig. We want to do something about these knots, because this is a darker rooted wig. You can kind of see the little knots here and i haven't done anything to this way, except for cut the lace on her. So i'm going to go ahead and take my concealer before i put her on my head because once she's on my head, she's stuck there and i'm taking this concealer, just a very small amount, and i'm just brushing this along that line where the part is, and You don't want huge blobs because it will kind of seep through you just want to use a very small amount, all right so now that we've done that we are good to go to put her on. So the next thing you're going to want to do is you're going to want to take your got to be glued or blade or whatever gel you are using and you're going to take a little bit of this. You do not need a lot. I usually start out with what i would say: a pea sized amount would be, and i'm going to put dots so i'm putting dots right where my hairline ends. So this is going to be on your forehead. Just a tiny bit. It'S okay! It'S not a huge deal, you can come back further if you want, you could do this on top of the wig cap. If you wanted to instead of write directly onto your skin, totally up to you, whatever your personal preference is the other thing that's totally optional. Is i usually stop right here at the temples of my hair because i like to have it glued down enough to where i don't think it's gon na go anywhere and it looks natural, but i don't usually pull my wigs up, so i don't feel like. I need to go all the way down to where my ear is, but you can absolutely do that if you want to, if your wig has ear tabs, you can definitely bring this all the way down. I'M only going to be bringing this to my temple area. So now that i have these dots, i'm literally just going to connect the dots together - and it's just going to give you this really nice thin strip of gel aka wig glue. Because that's what we're using it s. And then you want to let this dry to a point of it being tacky. You don't want it to dry completely. You want it to just be tacky very similar to what you would do if you're using lash glue, how we kind of let lash glue, get tacky to the touch and that's what helps the eyelash stick. It'S the same concept with your wig just with different products. So i'm gon na go ahead and go over this one more time, and then we should be good. The second time i do it. I do it with a little bit less because i feel like i already got a good base here. The only place that i like to concentrate and put a little bit more product is right here in the center of my head. I find that that's the place. That kind of i don't know that's a place that you your eye goes to first and it's the place i feel like we all look at as wig wears like on other people's hair. You like look right there to see how natural it looks. So i always like to just make sure i have a really good amount there. It also tends to be the place that'll lift up the most if you're, especially if you're wearing a wig, that's a little bit bigger on your head. So once you feel like you have a good amount of that on there you're gon na, let that that last layer dry to a tacky texture and then we're going to put the wig on all right. So i went ahead and let this dry for a couple minutes and it's got a nice little tacky texture to it. So i'm going to go ahead and put the actual wig on now. So what you want to do when you're doing this and my recommendation after doing a lot of trial and error is you're going to want to take your wig you're going to want to flip it so that the two little hooks are sticking out like this. So you have like a little bit of like a bowl if that makes sense to the wig. The reason i do this is because i want to put this wig on, but i don't want it to automatically stick to the glue, so i'm going to be putting it on back a little bit further so that i can pull it forward where i want it To go so, if you fold it over like this, so the little hooks are sticking up and you have like this bowl when you go to put it on your head. It'S not gon na be as far up on your forehead, so i'm gon na go ahead and take this, and i set this right here - i'm gon na put the little clip in the back and then, if you see now, it's like back a lot further than I would usually have it and now i can kind of move her to that glue space and then you're just going to take your hand and you're going to press her down. So now that i've got her on i'm going to make sure i've got this pressed down really really well lined up with the glue. This is also a great time to kind of see if you missed a spot, or maybe you went back a little too far. You didn't come up far enough, but this is pretty good again like i said, i'm not gluing this side part right here, but you absolutely can you would just put glue all the way down here and then stick it as well. It'S not like crazy hard to do you're just going to bring that line down a little bit further and i'm just taking my hands here and i'm just pressing it in there. So once i feel like i've got it where i want her to be she's good she's on there, i'm going to go ahead and take whatever it is you're going to be using i'm using this velcro situation, but you can use anything that you have at home. All right, so you just want to make sure it's nice and tight, and it's going to go right over that spot and down this way on to where you've glued it down. You'Re going to leave this on for honestly the longer the better i always recommend like 10 to 15 minutes. So what i usually do is i do my makeup. I install my wig and then i do like my lipstick or i put my eyelashes on or i go have my tea or whatever, and then i come back and by the time i'm done doing whatever it is. I'Ve done it's dry. The last step is just to take this off and just make sure that everything is really kind of stuck where it needs to be stuck and yeah, and then she's not really going to go anywhere. So i'm going to go ahead and let her dry for about 10-15 minutes, and then i will take this off and kind of show you i'll pull on her a little bit and kind of show you how well she's stuck all right. So it's been about 12 minutes, so i'm going to go ahead and take this off here and i did go ahead. Just really make sure it was nice and safe about halfway through i went through and took my blow dryer on a cold setting and just kind of went around it just to make sure i got it glue really tight and, as you can see like, i'm not Gon na rip, like obviously you take this and you rip it off your head, it's not wig adhesive glue, which i do have a video where i install a wig with wig adhesive glue, which is gon na, be a lot stronger. It'S meant more for multiple day wears, which we don't tend to do as much with synthetic wigs. That'S something that you would do more with like a human hair wig, but um with the synthetic wigs. This is really just made more, for you know one day and, as you can tell like, i can run my hands through here i can like you know i can pull and it's not like coming off. You can see that it's still attached to my scalp here and i'm pulling up. You can al. This also helps. If you want to like pull it back and stuff, you don't have to worry about it, lifting up or flipping out. I can totally take this whole thing right here and i can pull it back and it's all going to stay stuck on my forehead like this and then the last thing that i recommend doing just again to help make the part look a little bit more natural To make it just blend more into your hairline and everything is i'm going to take that same concealer i put on the inside of my cap and i'm going to go ahead and, oh, that's the zoomed in side of the mirror. That'S not gon na work, but you just want to use some type of flat brush. I um eyebrow brushes work really well. You want to get a little bit of this product on here and i do have another video where i kind of go in depth on how to do this, which we can link for you guys. So you can check that out too, but you just want a little bit of product on your brush here and then we're just going to literally paint a line on our part here and then i'm just going to take my hand and i'm going to blend it. In if you get a little extra excess on the hair itself, you can always take like a makeup, remover or mice, clear water or whatever. You want a little makeup sponge with something on it. A q-tip or also like a makeup. Wipe would work too, but you just want to take this, and you want to just blend this in, and that's also just going to help hide those knots a little bit more. It'S going to make that part stand out a little bit brighter, so it just looks more flesh toned. So you just want to use a shade that matches your skin tone and then you just blend it in like that, and it makes like instantly a huge difference on the way the part looks and you can bring it back as far as you want um, you Can you know only do a little bit if you want to, but it just makes a huge difference and, like i said you can kind of take your wig you can you know i can do a little flip test if you want that's craziness, but it literally You'Re gon na have hair all up in your eyeballs, but your wig's gon na stay on. Oh god, it's in my eyelashes, okay, there we go all right, we're good, but like it didn't go anywhere. It'S not gon na go anywhere. If you do notice once you've done all of this and there is a spot, that's kind of lifting up, you can just take a little q-tip and just kind of insert it a little bit more of that glue right in there and just press down and let It sit for another 10 minutes and it should be fine. That happens sometimes with me, where, like i'll see a little spot where i just didn't get enough glue - or i didn't put it right in the right enough spot and the lace is up a little bit too far, and i just take a little q-tip or a Makeup brush with a little bit of that gel on it and just kind of get that little area pressed down really well and just leave it for like 10 minutes and it'll be totally fine or you can take your little wrap and put it back on whatever You want to do so, that's pretty much it! It'S not crazy hard. You don't need a whole lot of stuff to do it. It just takes a little bit of time. It'S going to take an extra 5-10 minutes to put it on your head and then just make sure you plan it out so that you can do something while you're waiting for it to dry, but other than that it puts your wig on keeps it on. So it's not going to budge or move during the day, which sometimes we just need that i do a lot of just throwing goes. But every once. While i like to do this, especially if i'm going to be, you know out being more active and i don't want my wig flying off while i'm doing whatever i'm doing so, that's pretty much it. I hope you guys liked this video. If you found value in this video, i'd really appreciate a like. It just helps youtube know that people are watching and it pushes my video out for more people to see it um. Thank you guys for watching, and i will see you next wednesday for the next week, video you


Comments
Veronica Hawthorne: Hey Jesse! I’m a new subbie and I’m loving your videos! You are a genius with wigs! Wow! I can’t wait to watch and learn so much more from you! Awesome tricks and tips! ❤️
spezak: Your diamond studded fangs are EVERYTHING and I’ve wanted them for SO long! Gorg!
Missi Midcap: I'm just starting out in wigs. Thanks for keeping it real. I really like the part where it got stuck in your eyelashes cuz junk like that really happens. I will be watching lots more of your stuff
Pamela Hill: Thank you for this video! Helps me a lot!
Alison Jetmar: Great tips great wig. I sure will try these. Thank you pretty woman!
Liz Zy: Can we use lash glue instead? Thank you !
Lori Couvillon: Great tips, I sooo appreciate it, thank you for this video
Kathy Royce: Thank you so w for this videoI’ve had my wig since August paid $499.00 don’t know front from back
Shawn Myers: Omg! I was doing the got to be glued all wrong!! Thanks for the video I got it right now!!!! No body will know now.
Rabatzo Ratzofatzo: So valuable! Thank you!
Spring Chaser: Your makeup eyeshadow blush and lip cover are so pretty
Kathryn Castaneda: Thank you miss Jesse . loved this video.
Sapphire Bukach: Yes, you are so helpful. This is my first time buying a wig with no hair. I want human hair, but can't afford it and then looking at high heat resistance hair wigs.
Sharon: That was great!! Ty ! Just got my Wig today, I wanted to know about creating those little Baby hairs around the front? Also, how do we wash it and condition it, what products to use? My Wig us from Jessie's Wigs, It s 100% Remi, Real hair .
cozyverbena: Hi Jesse, Would installing the wig using this method help to blend the hairline? I would say that's my biggest insecurity when it comes to wigs, the hairline ♥️ Going to buy these products to try this on my new wig coming in the mail. Rylan from CSC
Stephanie Swtchks: What do you recommend for people who profusely sweat? Got to be rinses right off. Head stockings get warm and stretch and fall off bunching under the wig or falling off taking the wig with it. Bands are the same. Silicone, fabric it does not matter. They heat up, stretch, become soaking wet and fall off. I am incredibly thin haired in the front so clips do not help. Ghost bond helps the best. Was wondering if you had any tricks? I do take anti-sweat pills that help unless it is a hot ass day.
Darlene Kennedy: Love your videos. I am wondering what type and brand of wigs you're wearing, because they seem to lie flat and seem so natural.
MsLeafs13: how does this glue hold up to sweat, humid temperatures? And do you have to use a cap?
The Merz: Enjoyed, thank you.
jennifer Carney: Thank you so much for this I just need to know where I can get that got to be glue from and get the other as well thank you so much for this
Mathias: How do i make a non lace front synthetic wig look good?I know its pretty much impossible but i would really appreciate if you could make a video on it or respons to this comment!❤️
Nancy Deutschman: I have hair loss but not total. So, I comb hair to nape of neck and twist it and fold and clip. I always sew a comb in the nape of the neck of wig so I came co.b the co b up in the twisted hair pinned on my nape of my neck. I glue at the forehead with what I use and off I go. I'm a special needs bus driver so it has to stay. And it does
Ananda Bricker: I finally got one of those Velcro things. It is easier for sure. I think it was $2 from SHEIN.
Shana Sturtz: How do you get the wig off? Is this product water soluble?
Karima Lachtane: I prefer a wig grib, what do you think about those? ❤️
April and Bella: Fab video I had constant slippage from my wig cap girl I quit and got a wig grip and there was Oklahoma wind was scary tooo
Judy Anne: This is off subject but what substitute can you use for silicon for wigs?
Hey McFly: What about the back? Would u glue the back too?
dizzyk54: Thanks for the info!!!...Vicki
Rose Mobley: Love your lipstick and makeup.
Mr Enigma: So. I've got an unusual question. Starting this off, I'm a guy. Lmao. I'm getting into the cosplay scene and going to Japan for a few weeks to attend a series of events; that being said -- I bought a long white (synthetic) wig, and no matter how much I try to work on this ... Yeah, no. You can definitely tell that the longer wigs were either not intended for men, or they are just impossible to make look natural (then again, it could be the fault of having a white wig). Do you have any pointers on this conundrum?
Sapno Ki Rani: Nice
Emma Chapman: Wig caps keep sliding off my head when i move!
Kathy Royce: OMG! You already scared the hell outof me!! Glue!!
Chula Marie: I swear us black people make things difficult you made this look easy
Ramona Dolese: Ok. I'm going there. I will be having to wear a wig due to chemo starting for cancer, my fiancee and I were wondering does any of these glues hold on if say a "sexual encounter" gets a little "rough"lol?
Mimi Keel: You look like Kelly Clarkson on that thumbnail.
Anna Langham: What is the wig u are wearing please?
Sheila Brown: takes waaaaay too long
Bibi Khusial: How do you take the wig off
Hélène SB: What is This wig ?