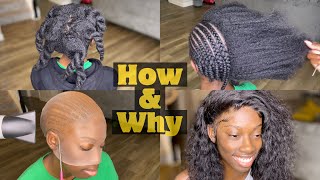
How To: Natural Quickweave/ U-Part Wig
- Posted on 25 June, 2019
- T Part Wig
- By Anonymous
Hey Beauty!
Thanks for checking my description box! Read below for everything you need to know.
BUSINESS:
Let’s Talk Business…
Email Me - [email protected]
JOIN MY GLAM VIP NEWSLETTER:
Like my videos? Join my monthly newsletter for more glam content. You will receive access to all of my secret giveaways for this year, my favorite beauty tips, updates on future events + more!
Don’t miss out! Join here: http://bit.ly/2jGA77S
FOLLOW ME:
Snapchat: biancacharisma
Instagram: https://www.instagram.com/biancacharis...
Facebook: https://www.facebook.com/BiancaCharism...
Twitter: https://twitter.com/biancacharisma
PRODUCTS USED IN THE VIDEO:
Brazilian Kinky Straight Hair (2 Bundles)(14 & 16in) - http://biancacharisma.mayvenn.com
2 Wig Caps - https://amzn.to/2RykfFr
Deluxe Multi Use Weaving Cap - https://amzn.to/2Yb1PwU
Sewing Hair Thread & Needle - https://amzn.to/2J6MtDp
Revlon Wand Curler - https://amzn.to/2X7emFn
Hair Glue - https://amzn.to/2J4zmmk
Thanks for reading! Have a blessed day and leave any question or video request in the comments box below!
Hey beauties Bianca charisma here today, I'm going to show you how to get this natural super, pretty quick leave! U part wig so first thing that we're gon na do is we're gon na start with your hair braided. So, as you can see, my hair is braided. I have a perimeter braid, which it goes all the way towards the back of my hair and then the rest of my hair is just braided to the back and pinned up and then the two little braids on the side arm. I leave out braids, so I'm using two wig caps and the reason why I'm using two wig caps is to make sure that I don't get any glue on my actual hair. So a quick weave pretty much uses glue and I am all about protective styling. So I want to make sure my hair is protected from the glue, but I'm still getting the hairstyle that I want so make sure to use the two way, caps and place them directly over your braids and then I'm going to be using this. It'S like a deluxe weaving cap. This is perfect for wigs, so I'm using this on top also to protect my hair from the glue, but also to have a u-part wig. So I want to be able to once I do my hair in the style. I still want to be able to reuse this hairstyle and have it be a wig. So, even if I take this hairstyle down, I will still have it glued to a wig cap which will make it a easy, u-part wig for me to wear. Whenever I want so right now. I am sewing my perimeter braid to the actually three weight caps. So those two caps that you just saw me put on plus the weaving cap that I put on top. I am pretty much sewing all of that together to those perimeter braids that I showed you in the beginning. So if you guys pay very close attention, you see that there's a little flap towards the front of my wake cap. Now I did not cut that flap off, but I would suggest that you do if you just notice the flat got sold up and I didn't mean to sew it up, so you know make sure to sew your perimeter braids and then the flap in the front. It'S right before the adjustable band make sure to just cut that off. You can cut that off after you sew the wig cap points, your perimeter braid just make sure to cut it off because it can get in the way when it's time for you to actually style your hair. Your leave out here with the actual the actual hairstyle so the week so yeah just make sure you cut those flaps off. I do apologize for not showing me cut it off. I don't know how I sold the flap up and I forgot to cut it off. So I do apologize about that now. You don't have to cut it off, but I highly suggest that you do so. I just wanted to show me pretty much sewing that cap onto my now I'm using a white pencil. This is a white lip pencil eye pencil. I got it from the beauty supply, I'm pretty much just tracing around my leave outbreak. I really want to make sure that I see it. That'S why I chose this white color so that I can see what I'm doing, because I'm gon na use be using this hair and I'm gon na be using this glue and I'm going to be pretty much taking the weave and then placing it on my head Around that white? U so the first thing that I'm doing is I already pre-cut my wefts, so I had a bundle of hair. This hair is from mavin. I do have a mavin store, so if you happen to notice that you really like this texture of hair and how I style my hair feel free to shop, my amazing store, I will put it in the link below, and I will also just put it right Here on the video, so you can see where to get this hair from and I will put more information on it as well. But yes, so I already pre cut that piece of hair that you just saw me blue onto my head. I pre-cut it. I measured it before I glued it onto the back of my head, so make sure to measure it before you cut your weft and before you glue it onto your hair, so I'm gon na show you once again, so I am taking a pre-cut piece of hair Or a pre-cut wet gluing it, and then I am going to be placing it from one side of the cap to the other and I'm basically just adding tracks on top of each other. So don't put it directly on top, but as you can see, this is how I measure you want to put it a little bit above that track. So yep right above and you just want to place it once this blue on the track and then press it down. You can also use a blow dryer just make sure that it dries faster. I didn't have my blow-dryer on him, or else I would have so. As you can see, I used a smaller cut piece just because I like to really make sure that I'm measuring it to fit exactly around that white u-shape. So you can cut your web smaller. If you would like to it's really up to you, but I did what I needed to I cut around and I placed around and then now I'm just cutting the access that was inside. Of that you, I cut that off and I unbraided my hair at the top my leave out here and I'm blending my hair with the actual quick weave that we just created quickly a slash. You part ways. So now what I'm doing is. I am paying very close to my hair and wherever my hair stopped, I basically just cut layers in the front, so I only cut the weave and if you guys can see like this hair, I love it. It is so natural looking. It looks like I just blow-dried, my hair. I like this hairstyle because it's perfect for the summer when your hair is kind of sweat out a little bit. It looks very natural, so this looks like my actual hair. Just you know wine curls, so I decided to wine curl it give it a nice like a effortless, wavy, look, but still it looks like my natural hair, so it's very easy to blend with my natural hair. So this is pretty much the finished. Look. One side is combed out, the other side is nice, so I'm going to go ahead and comb out this other side of my hair just to get that effortless, wavy natural. Look, this look, people really didn't even know it was a quick lead. They didn't know it was a you part. They just thought my hair was out looking healthy, looking natural, so yeah. This is a great hairstyle for you to try. If you like to do your own hair, it's really really nice. I liked it a lot and also make sure when you do put heat on your leave out, use a heat, protectant spray, heat, protective spray and I'm just using some edge control, make sure my edges are nice and smooth and that pretty much finishes the look. I absolutely love this look. It is just so pretty to me so natural and I love it, so I hope you guys love it too. Give me a thumbs up subscribe to my channel, and I will see you in the next one.

Comments
Ciara Smith: I love this look, it’s so pretty and natural. I’m definitely going to give it a try
Twana Pickens-Stevens: Your hair looks so beautiful and natural. You did a great job
elana604: How long does this look last considering the glue
catmo59: Girl you know that your hair. Lol