How To Make And Install A U-Part Wig | Silky Straight Hair | Divamehair
- Posted on 02 January, 2022
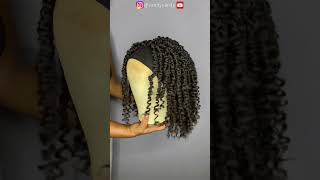
- U Part Wig
- By Anonymous
Let's get this video to 100 likes!!!! WATCH ME TRANSFORM MY OLD SEW-IN INTO A FLAWLESS BONE STRAIGHT U-PART WIG!!
THANK YOU FOR WATCHING & SUBSCRIBING!
•••••••••••••••••••••••••••••••••••••••••••••••••••
ITEMS USED:
- WIG SATIN DOME CAP
- NEEDLE & THREAD
- 3 BUNDLES OF DIVAMEHAIR EXTENSIONS
•••••••••••••••••••••••••••••••••••••••••••••••••••
ORDER YOUR GLAMOROUS HAIR EXTENSIONS OR CUSTOM WIG TODAY
FACEBOOK ‣ https://www.facebook.com/DIVAMEHAIRCO/...
DIVAMEHAIR ‣ https://www.instagram.com/divamehair/?...
▷ WATCH DIFFERENT STYLES OF MY HAIR EXTENSIONS: https://www.youtube.com/watch?v=vxI7qn...
•••••••••••••••••••••••••••••••••••••••••••••••••••
Make sure you SUBSCRIBE to my channel and hit the NOTIFICATION BELL, so you don’t miss any of my NEW VIDEOS!!
•••••••••••••••••••••••••••••••••••••••••••••••••••
▷ KEEP IN TOUCH WITH ME
INSTAGRAM ‣ www.instagram.com/iamqueenlexus
TIKTOK ‣ https://www.tiktok.com/@lexuslc500mode...
FACEBOOK ‣ https://www.facebook.com/DIVAMEHAIRCO/...
If you're a company and would like to do business with me OR if you wish to send me fan mail simply contact [email protected]
_____________________________________________________________
▷ MY MOM'S SHOP: Traveling Edge Styler https://www.slayedge-onthego.com
♡ LOVE YOU & THANK YOU ♡
✨FOLLOW ME ON SOCIAL MEDIA✨
IG- IAMQUEENLEXUS
TIKTOK- LEXUSLC500MODE
Hey babes so pretty much what happened with the audio. I have no idea, i pretty much recorded and basically my mic was not pushed in all the way. So in this clip right here i am showing you all what i use to moisturize my freshly washed hair. This is pretty much how i prep my braids so yeah, that's my baby sister. In the background she was filming, tic, tacs, just keeping me company. While i record my videos, she loves to watch me. Oh wait! So pretty much right here. I just braided up everything that i'm gon na leave out for my u-part wig, so i'm going to leave out, of course, the middle part, and i'm also going to leave out the sides and in this scene i pretty much am just showing you all the materials That i use with my fresh braids with my pusha t braids, so i have my mark, my marker, my scissors, the wig cap, my mannequin sasha, and i have some scissors and i'm just yapping the yappy yapping yeah, just yapping yapping yapping so in this next scene. I will be showing you all how i mark my hair, so i put the dome cap on and i get a satin dome dome cap. I make sure that it's pretty thick don't get anything, that's thin because you don't want to like make it have any holes in your dome cap, so get something. That'S just pretty thick like the one that i specifically got but yeah. So i'm pretty much just going to mark behind my leave out, so i'm just filling it around with the braid, as you can see, and i'm just marking behind my leave out and yeah. So i'm just going to let you guys watch as i do this part, because there's nothing really for me to say so: enjoy some elevator music all right beauties. So this right here is just me: wrapping up the um marking out my hair, because pretty much this will give me a guideline for when i sew in my hair. So the goal is to sew your hair in that little area that you marked so yeah the next scene you're gon na. So i pretty much just reviewed my video to just clear up some space off my camera and i noticed that nothing was being recorded as far as audio how amazing so i'm gon na go ahead and repeat to you guys just the rundown on everything. So i pretty much braided up my hair um. The two little braids that you see in the front is everything that i'm going to leave out for my leave out, and this right here is also my leave out for my middle part, because i'm going to do a middle part, half wig. So i'm going to tan and show you all. I got pretty tired, which i always get tired like around this braid and this braid in this braid, because it's the back of my head so yeah. My arms just start to go like this, and you know your girl back, backstart hurting and yeah. It'S pretty rough back there, but at least it's flat. Everything is flat. I need a flat. You need a flat foundation for your half wig, because we do not do lumpy half wigs, so i am going to show you all the material that you're going to need for your half wig your. I have my make my own wig dome cap right here. This one just cost me two dollars. I got it from my local beauty. Supply store cost two dollars, and this is what it looks like. This is what the cap look like. I'M kind of just gon na put it on for you guys right now. So you all can see what it looks like. So this is what it looks like. So what i'm gon na do is just pretty much sew my tracks along the white area that i um separated. I started it from back here and my leave out. My edges are right here, so i'm pretty much going to just sew the tracks going like this all the way around until i reach the top right here, because i'm going to end up cutting that part out. So what you need is, of course, your dome cap. You will need the other materials that i have is, of course, my thread and needle. That is for me to be able to sew my tracks onto my hair. Then i have this right here. This is pretty much for me to be able to put sasha on, and this right here is my mannequin baby sister called her alien, so she's gon na be the alien sasha. So i'm pretty much going to put the dome cap onto the mannequin head and then i just stick this right here and i'm pretty much just going to screw this onto a desk so that i could be able to sew my wealth onto the dome cap. So i'm going to go ahead and i'm going to just record how i sew in the tracks to save me some camera space. So i'm going to show you guys how it is, how it's done in the next scene so make sure you stay tuned and go ahead and hit that subscribe button. If you have not already and joined the gang okay, tell them join a gang girl join, join the squad, learn something new period, see y'all in the next scene, so i pretty much just washed the hair and it's 1 53 a.m, and i'm pretty tired. But this is just what the finished product looked like. I will show you guys what she looks like in the morning but, like i said i just washed the hair, so i'm just gon na let it dry, but this is what it looks like so far. So far my sister said the alien has reached her beauty, her beautifulness and it's time for her to go to sleep. It'S 1 53 a.m. So i'm happy that i got finished and i cannot wait to apply it tomorrow more well in the morning, for you guys. So um yeah, i will see you guys in the morning i'm just going to let it air dry. I like how flat it is so flat. Let'S just look like this because it's wet right now so yeah see you guys in the morning all right babe. So this is pretty much how the hair look. It'S really silky, it's really nice and um. I pretty much just sewed it in i sewed in all the clips. I cut it out, so i'm gon na show you all how it looks when it's on my head - and this is a half wig. This is how i make my half wig, so i pretty much just take it along this area. The clips that i sewed onto you just clip it onto your hair. It'S nice and simple. I didn't need a clip in the back, because i really just did it to perfection. So now i'm going to take a clip and clip in this part and remember this part of my edges, i'm going to leave out okay, so i'm going to take the other clip and pretty much do the same. You leave your edges out. I had so much fun making this and now i'm going to just clip in the back underneath my braids, so i'm putting two clips on the side i put in two clips on the side and one in the back, and this is how it looks. This is how it looks so i took out my old sew in i pretty much use the same hair. This is the filipino hair, or this is the vietnamese hair from my hair brand. So make sure you guys check that out - and this is what i mean about just having a and i'm gon na, get my lighting right. So this is what i mean about having a super flat foundation, so my foundation is extremely flat. It looks like i have a sew-in. This is the back of the hair and see it's a u-part wig extremely flowy. I love this hair, so pretty so all i'm going to do is just begin to take down my hair in the middle and what i'm going to do is i'm going to add some heat protectant serum on my hair in the middle, so pretty much what i Will do is let me get this comb once okay, so pretty much. What i would do is take my hair. Oh part, it down the middle, it's kind of hard parting, your hair, when you're looking in the camera, but i just want to show you all how i'm going to do it, and this is what it looks like before. I straighten it and, of course, i'm going to take out this part, but i'm going to go ahead and straighten my hair off camera. Hi babe, so i am gon na actually show you guys what it looks like. So how do you remove it at night? You pretty much just lift it up. That'S all! That'S all you're doing all you're doing is lifting it out, because it's nothing but clamps, it's all clamps, so you're just pretty much stretching it lifting it out the back. You don't even have to lift anything out and you just lift it up. You just untuck it pretty much. You'Re untucking it. So this is what my hair looks like. This is what it looks like in the back. I just twirled it up. So this is the only thing that i don't like it's just that the brown was showing so um. I just took some pictures from my thumbnail and i noticed that this brown was showing we not having that. So i'm just gon na cut it. It'S not showing anymore, you just want it seamless like this, that's it, and this is what the inside look like, like i said you guys put in some orders, and you guys want me to do a half wig for y'all um it'll be a lot more neater Than this, this is just mine so but yeah. This is how you put it back on. I didn't put any clip right here because, like i said i did this to perfection honey. So what you do is you just take the clamp and you clamp her on like so that's it you just take it. Take your clamp and you clamp her on that's it and then get that out my face. So pretty much. For this part, you just clamp. It into the braid, that's all you're doing is clamping it back. I mean you're, not even clamping it. It'S a comb, so you're really just combing it into place. You see this. This is the braid and i'm just gon na tuck it in and it's not painful. That'S why i like these over the clamps, like the clamps that i use to make my clip-ins they're painful, like they hurt, and i used to sleep with them in my head. When i was younger, i used to sleep with them in my head and they just really broke my hair out, but i, like these combs a lot a lot. A lot better now make sure everything is tucked in up here. I'M just gon na just kind of tuck in everything and i'm just take my comb and i pick my hair up and i would comb it so like that. I just take it and then i would comb it and just i pick my hair up and then i comb it and then the back. I start right here pick it up and i comb it. So this is what the back looks like so yeah lovelies, like i said i really enjoyed creating this video for y'all. Let me know what y'all think in the comment section below. Oh silky, silky, love silky. This is what it looks like. It looks so natural i'm going to create a 40 inch wig next, because i don't know, i just want a long straight wow. You know, but yeah, if you guys enjoyed this video, make sure that you give my video a big thumbs up. Make sure that you subscribe to my channel, most importantly, because i am trying to get to 500 subscribers, we got a way to go, but yeah. Let'S get this video to hmm, let's get this video to a hundred likes. Okay, let's get this video to 100 likes and let's get me to 100 subscribers all right! That'S my goal: let's do it, let's get it love you all stay safe out. There happy new years! Happy! 2022. I wish you all the best full of love, light and blessings yeah go ahead and make sure you follow me on my social media check out the description box below for details on this here where i purchased it from which is. I got it from my hair company, but yeah love. You all peace out, see you next video bye. You


Comments
Tiamara McGaughey: This is the best one I’ve seen. This video needs more attention!! Thank you so much
jamie zebra23: Yesss thank you ! You look amazing
mscharita: Hello May I ask how many bundles did you use for this look?
Tina Foster: Remember that is an Lexus