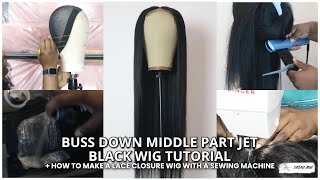
How To : Make A U-Part Wig On Sewing Machine | Mesh Ventilated Cap *Step By Step*
- Posted on 20 June, 2022
- U Part Wig
- By Anonymous
⇣⇣⇣⇣⇣#sewingmachinewig #wigmaking #upartwig
_______________________
Connect With Me ⇣
Instagram ⇢ @theharelife / @theharelifeofficial
Twitter ⇢@theharelife
Facebook ⇢ The Hare Life
W a t c h M o r e ⇣
- How to : Double Tracks on Sewing Machine
https://www.youtube.com/watch?v=_n9Wpo...
-SLEEK High Ponytail On Natural Hair (NO Bobby Pins,NO Sewing,NO Glue)
https://www.youtube.com/watch?v=YaHjhx...
-From Dark Red to Bright Red | Color Fix
https://www.youtube.com/watch?v=Y0RfXO...
P r o d u c t s U s e d ⇣
- Mesh Ventilated Caps https://www.theharelifeofficial.com/co...
- Markers https://go.magik.ly/ml/1j47h/
-Raw Indian Wavy/Curly bundles https://www.theharelifeofficial.com/co...
-Raw Indian Deep Curly https://www.theharelifeofficial.com/co...
- Amazon Store https://www.amazon.com/shop/theharelif...
BUSINESS INQUIRES ONLY ⇣
FTC | Some Links provided are affiliate links. which mean if you make a purchase through the link I will receive a small commission. Thank you for your support : )
**** I DON'T OWN ANY RIGHTS TO THE MUSIC IN THIS VIDEO****
THANKS FOR WATCHING XOXO-SHAYNE
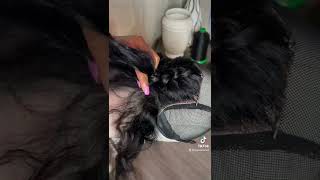
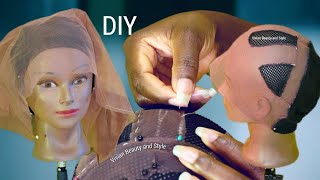
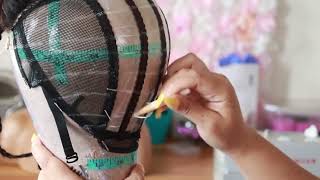
What'S up y'all welcome back to my channel if you're new to my channel, hey girl, hey make sure you the subscribe button and turn on the notification bell, so you'll be notified when i upload a new video and if you're not already, sis make sure you follow Me on instagram at the hairlife and the hair life official, so you guys today i'll be showing you how i made this? U part wig on the sewing machine, super quick and easy on this mesh, ventilated cap. I really hope this video is helpful to you guys, because when i was looking i did not see too many sewing machine. You part videos and i did not see any on a mesh, ventilated cap, so i hope this can be helpful to someone and if you guys are looking for mesh, ventilated caps, i do have these available for wholesale, as well as adjustable elastic bands. So just check my description box and the links will be down below alright. So i'm giving you guys a good look at the mesh, ventilated cap and i'm going to grab my soft measuring tape. You want to make sure it is this kind and not the kind that you measure your walls with, so i'm just showing you guys that this cap fits perfectly. This was a size, medium, measured, ventilated cap and i'm on a 22 and a half head. So there was no need for me to resize because it fits perfectly so you're going to take the cap you're, going to line up your middle line to the middle line of the canvas block. So for our leave out. I want minimum leave out for the? U parts, i only want one inch width and then for lengthwise we're gon na go four inches back, so literally minimum leave out. This unit was not made to have edges out either, and i'm going to show you guys what to do. If you want to leave your edges out, so i'm going to use my pen and gear metallic marker y'all already know if y'all watched my videos before these are like two dollars for a four pack at walmart, my favorite, and they last a long time. Okay, so you want your leave out area to be symmetrical. You don't want your one inch to be off, so this is why we're gon na go ahead. We'Re gon na mark at the one inch and then we're gon na mark at the two inch that half an inch mark should be on your middle line. So i'm just gon na take my metallic marker and mark that off and then we're gon na go ahead and get our four inches of length back. This is what you should have so far you're gon na just take those two pins out. Get your measuring tape. Start at the silver piece line it up on the front of your cap on both of your lines and then you're gon na go back to the four you're gon na make a line. That lines aligns with the four on both sides of your measuring tape and then you're, literally just going to connect those lines straight down to the lines that you made for your width. And then, when you get to the back, all you're going to do is just make a u-shape on the back of your lines. So after you finish those steps, this is exactly what it should look like. So now i have that silver piece on the back part of the: u and i'm showing you guys, i'm going to be making a line on the top on the half inch marks and at the bottom we're going to do one inch marks just because you want More hair at the top than the bottom, and you want to make sure you don't run out of hair so, like i said the bottom up to the six, i did one inch lines, but once i started to sew, i realized i really could have started the Half inch lines, maybe at the four or the five, but i'm just going gon na, continue to show you guys exactly what i did so here are my guidelines. You guys i could not do my guidelines on camera. It was so hard to show. So i did have to do these off camera, but it's really simple. Just follow your line straight across after you make your middle line just line them up to your sides. So i know somebody's going to ask: can these same guidelines be used on different caps? So i did go ahead and show you guys a mesh dome and then this is a fully ventilated cap. I did the exact same steps. So if you want your, u part to go behind your hairline and you want to make sure you leave some edges and stuff out. All you want to do. You guys know the measurement. The lady caps and the ventilated caps have these tabs over your ears. You want to cut those off if you want to have this behind, like that. Like natural sew-in type of look on your edges, then you're going to cut that middle piece off because it is like a little a wire piece and it will not be able to fold if you leave that on so that little piece right there that i'm showing You guys you want to cut that off and then you can either cut your ear tab off or you can fold it back and just sew it down. So for this unit i'm going to be using our raw indian curly extensions, i'll leave the link down below for you guys, as well as a discount code, so make sure you guys check that out now i had ordered a closure a while ago to test out And it didn't match the indian curly at all um, but i do have raw indian curly lace for you guys now. Hd lace so just check all of that out on the site. All the links will be down below so instead of letting the hair go away. So i'm, like you know what i'll just use this for you part now this first weft i did do a quadruple with and my camera was not recording, but i just want to show you guys if you do a quadruple weft on a mesh, ventilated cap or A ventilated cap, you want to make sure you reinforce both the top and the bottom. These type of caps do have adjustable straps built into them. That loop is where your strap goes into. So when you're sewing, you want to make sure that you do not sew that down. So just keep that in mind when you're making your guidelines all right. You guys so now it's time to sew and i'm just showing you guys you're going to use a zigzag stitch on the mesh parts of the cap and you're going to use this straight stitch. On the plastic part of the cap, you do not want to use a zig zag stitch on the plastic part, because it will be hell trying to get that plastic off when you're done so like i said you want to make sure you're doing a zig zag Stitch on the mesh part in a straight stitch on the plastic. Now, if you're doing a double weft, i was trying to show you guys. I think i might have gotten up close, but i was showing you guys right here. You want to make sure you're stitching down on that top weft. So, like i said again, if you have a double width, make sure that needle is penetrating your top width right here, i'm just showing you guys a reminder to not sew your loop down. So if you need to fold it backwards and get it out of your way, then that's what you need to do so i'm just aligning this weft and you guys see i'm doing a single now for your single wefts. I personally feel like single wefting on these caps is a little bit more difficult, because you have to make sure that that needle is going directly through your weft. So if you need to hit the back stitch a couple times and get back online when you get to the plastic part, that's perfectly fine and i just want to say always make sure you guys are backstitching the beginning of your wife and when you're ending off Your wife always make sure you are back stitching at least three times, but i, like my wigs my clients, wigs i like them to be able to last them for years. I don't want anybody having any issues with tracks coming loose, so i'm not even going to hold y'all. I go a little crazy on the back station. My backstitching is probably like four to six times. Think we got too sexy for that metro. Tell me what you okay, so now, i'm just making sure i cut off the excess thread on both sides: you're going to have pieces of thread on your top and bottom, so you just want to make sure you snip those off and then i'm going to show You guys both of my loops are nice and free. They are not sewed down. My straps will easily be able to go in and i'll show you guys how to do that at the end, and then i'm going to show you guys now. I'Ve done a quadrupled width, i've done a double weft and a single weft and they're all nice and flat. No lumps no bumps okay. So now we're at the part where the adjustable strap is. You do not want to have your adjustable strap down. It'S just like the loop. You don't want to sew it down. You do not want to have to take these wefts down and re-sew, like that's just too much work girl, so just make sure you have that adjustable strap back. I always like to just put my wig cap on my canvas head, so i can make sure everything is nice and flat and i'm just showing you guys those two guidelines that i told you earlier that i did skip and then i followed the rest of the Guidelines up so, like i said in the beginning, you can start your half an inch a little bit closer to the top, instead of doing it in like the middle area, where i did so you're just going to continue to follow your guidelines all the way up. Now, once you get to the u-shaped guidelines, there's going to be a lot of stopping and maneuvering just to make sure you're hitting all those curves, but it's literally the same thing and you're going to use your zigzag stitch all the way at the top all the Times i think i'm surprised okay, so i'm all done sewing, and this is what it looks like. So it should look something like this when you're done sewing and you just want to cut around yeah you are, you do not want to cut the wefts. You want to cut that material in between your two lines and i'm going to show you guys a little small clip, because i was filming for reals as well. So i was trying to make sure i got footage for both and i also like to turn the cap inside out, so i can see any extra threads. You want to make sure you cut those off and, like i said, just make sure you're cutting on the edge of your weft to cut that little fabric, piece, how you do not want to cut your threads, and if you want to to be extra careful, you Can get back on the machine and go back around that last look one more time for some extra security. I am going to add some wig combs in i'm, going to show you guys the placement, because i only was able to show you guys me sewing on one, but this is what it looks like nice and neat everything's, nice and flat. I was super excited when i saw this. I was like this looks so good. So now i'm going to go ahead and take the plastic out. You want to get some tweezers and you want to rip those uh you're going to have two threads. So there's one on the top and then one on the bottom that you really got to get in there and get so you want to make sure you pop those and then you can stretch the plastic it's going to break and then you can rip all the Plastic out, okay, so now i'm gon na go ahead and sew the wig comes on. So i get this big pack of wig homes. I believe it's like 100 or 200 that comes in the pack. It'S linked in my amazon store. I will link that down below. For you guys as well, and i'm just going to show you guys the placement, where i'm i'm just going to line that comb up to the edge where i showed you guys, i'm going to sew it and then i'm going to use a straight stitch. I do not sew combs down with a zigzag stitch, i feel like it looks better and i just feel like it holds it down a little bit better. So for the combs straight stitch. So yeah here is the finished look of the wig, i'm showing you guys inside and i did wash this after and if you guys follow me on instagram, then you saw me post my favorite, shampoo and conditioners for our raw indian hair. So make sure you guys follow me and i'm also going to be posting a video on how i wash this for you guys on here. So you can see and then i'm going to show you guys what the hair look like after i got done washing it and i do let the curly hair dry upside down it just really plops the curls together, as you guys can see so beautiful. So don't forget to use the cold raw hair at checkout on the website if you are getting some raw indian curly, which you should because it's perfect for summertime y'all. But i wear my indian curly all year round, like i literally love it, and if you want a wig made by me, you can also get that on the site. I will have all the links down below and if there's something on there, that you have a question about just send me an email at the hairlife official gmail.com, the one at the bottom of my description is for youtube. So if you have a business question, please send that to the hairlifeofficial gmail.com, so yeah you guys. I hope this video was helpful. Let me know down below leave me any questions down below. I try to answer them as quickly as i possibly can so. Y'All can just see how bomb it is because it can also straighten it. Can curl crimp whatever you need to do, i'm telling y'all it's so versatile, so bomb so yeah. Here'S the pictures thank y'all again for watching and i'll see you on my next one. Bye,
Comments
Janisha Black: Thank you so much for this. Really big help!!!
Asia Inc.: Love it
Nyekula Koroma: Omg!!!! Thank you so much! There’s literally no U part wig tutorial out that is I’m depth
Khaleesi: Can you do one with 5x5 closure on adjustable cap I want to know closure placement
Steph: Is your needle set to the middle setting to to the left?
Beautyatwill: Great video
I Am Shabrina The Co-Creator: Thank you cause im still trying to figure ure out why we still hand sewing wigs lol