How To Layer/Cut Your Clip-In Hair Extensions | Diy Project
- Posted on 18 February, 2015
- Clip-in Hair Extensions
- By Anonymous
Check out the Irresistible Me extensions used in this video here: http://bit.ly/IM_Jade
Why should you even layer your hair extensions?
Watch today’s video to get some really good tips and tricks on how to layer your hair extensions. Jade’s own hair is pretty short, so she uses this technique to blend 24 inches long clip-in hair extensions with her much shorter hair. The information still applies for layering hair extensions with medium hair and long hair.
In terms of tools, you need a pair of scissors. Preferably hair dresser scissors – because they are good quality and they give you a better finished result.
An important tip is to number your wefts because you need to be able to put them in the exact same way after you’re done layering them. In a 200g set you get 10 wefts so number the ones you put at the back of the head (just write the number on the textile part with a permanent marker) and mark L and R for the ones that go on the left and the right side of your head.
Choose thin sections to work with and try to cut as little as possible. It’s better to go over the same section more than once than cut too much. There’s no fixing it if you cut too much hair.
Stop short of going all the way to the ends – so the hair looks nice and healthy all the way down.
Since this is a free flowing technique, you won’t have to worry about not getting things perfect.
Layering the hair extensions will make them:
- look more natural
- blend in better
- add volume and texture
- help curls hold longer
★WE'D LOVE IT FOR YOU TO LIKE & SHARE WITH FRIENDS!
Follow us on social media for exclusive discounts, coupon codes and some good old fun:
http://facebook.com/irresistiblemeoffi...
http://instagram.com/irresistibleme_ha...
https://twitter.com/IrresistibleMeO
http://www.pinterest.com/irresistiblem...
Snapchat: IMHAIRENVY
Jade's personal channel:
https://www.youtube.com/user/makemestu...
Also watch the “How to Trim, Layer, Style & Thin out your Hair!
https://www.youtube.com/watch?v=ZTsRpa...
How to dye hair extensions | DIY Pastel Green Hair
https://www.youtube.com/watch?v=AKf9fQ...
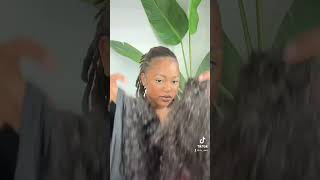
Hey guys, it's Jada, so today's video I'm going to show you guys how to layer your hair extensions. This is a technique that I recently started doing. I never used to layer my extensions at all, but since doing it I have been like. Why did I not do it earlier honestly, it makes the biggest difference to how naturally, your extensions look. Also, if you add curls and things like that, it just makes them hold so much better and they look so much more natural and you just get this gorgeous kind of volume and texture going on with your extensions. So so today I am wearing my irresistible me. Silky touch extensions in the shade silky white blonde: these are the 22 inch extensions, 200 gram white now I know this color is an exact match for my hair, but I am flaming on coloring my extensions soon, when I do my next crazy color heeey. So I'm I like to actually lay on my extensions prior to cutting, so I know where to put certain colors and things like that, so that is why I am doing it today. If you guys want to know how to color your extensions, a crazy color then check out the description box below the video will be posted there when the video goes live. So just so you guys know I am a qualified hairdresser, and so what I'm going to show you guys is probably the best way that you can cut your extensions. Even if you are not a qualified hairdresser, it's very very simple and you get this gorgeous result and it looks really really blended and you don't need to worry about getting things exact, because this is quite a kind of free-flowing technique and it does give you a Beautiful finished result, so if you want to know how to do it, then just keep it watching. So obviously it's going to depend on how long your natural hair is. My shortest layers are quite short, so they end about here and then I've got the length of my hair down here. So you think all right. How am I gon na burn that down to that? Okay, I'm going to show you guys some tips and tricks on how to do it, and just what I like to do so. First things: first, you will need some scissors if you can try and get your hands on some cheap hairdressing scissors, because they are better quality and they give you a better finished result: try not to use chunky kitchen scissors, because it's just not going to give you The best result, so what you want to do first, obviously, is apply your extensions to your hair. Now here is the trick. You want to somehow number your extensions, so then, the next time you put them in your hair, you put them back in the right order. There'S no point giving you how these gorgeous layers when the short areas are at the nape of your neck and the areas are on top. If you know what I mean, so you want to make sure that you're going to put them back in the same order. How I do this is just with a permanent marker on the little clips. I just write one for the base of my neck and then 2 3, 4 and number them on the way up for the sides. I go left and right just so. I know kind of roughly where to put them back in alright, so I'm going to take a vertical section. So this is where you can really see where your short layer is and then how it goes to the longer length. So what you want to do is grab your scissors and we're going to use like a bit of a notching technique. So that's basically, where you have your scissors and you just rock them like this, so you have them opening and closing like that, and you want to start where the short kind of lay it is and then open close. All the way till you get to the ends of your hair and that's going to give you a really nice gradual layer to your hair. So I'm going to move back a little bit, do a bit of a voiceover and show you guys how to do it. Ok, so I'm starting where my natural and as you guys, can see I'm just having the scissors on a little bit of an angle and I'm basically just notching into that top layer. When you get to the ends of the extensions, try not to cut in too deep, because it's going to make the ends of your extensions quite thin, you want to retain as much thickness as you can through the ends. So now I'll. Just take another stem section and then continue on I'd like to keep the back hair a little bit longer just bring the sections forwards and kind of tilt your head as I am that way. Obviously, you can see what you're doing, but because you're bringing it kind of forwards, it's going to leave those sections slightly longer, not massively longer, but it does give your hair that nice, natural, gradient, okay, okay, that is all that here that I cut off you'll, see In that part, how I stopped short of going all the way to the ends you don't want to make the ends of the hair to kind of thin and ready, especially because it is such a gap from my existing layer to the length of my hair. You need to kind of just counteract it. So obviously, depending on the angle that you have your scissors on, it will depend on how many layers it drops into your hair. A shorter angle is going to do very soft layers. Just in the top part steep is going to cut him straight, a fair bit towards the the nape of your hair. If you know what I mean so for these front sections, I did not layer. Those, as you guys saw what the G is, lay them from slide on, so just giving them a good brush and I'm going to connect them with my existing layers and then bring them down. I think layering around the face is really what helps extensions to look really nice and blended. So again, we're going to still use the same technique of kind of going side on like that. What you want to do is bring your hair forward slightly and you'll see where my existing layer is and then when their extensions are so I am going to grab this front section of my hair brush it on an angle and then what I'm going to do Is cut in and do this notching technique down the length of my hair, so you may need to go over it a few times to get your desired result. You can also spot treat it so grab it and then just cut down on a little bit of an angle by doing a little bits at a time you can really tail and make it to how you want it, and you don't have to worry about. Like. Oh, no, I cut too much off say all right so that, as that's just really really soft layers, but what I want to do is just slightly shuttin up the top kind of crown section. So what I'm going to do is literally section off my krill. So this is the kind of extensions that here in my crown section going to cream. It doesn't matter if it's a little bit messy, because it's just gon na add to the texture. What I'm going to do is twist all this section, as you guys can see and then see all this kind of scraggly bits. I am taking my scissors and basically gon na notch, all into that section. So just literally cut that section off all right, then I'm just gon na go in and just soften it out. So it's not too blunt, but by twisting it it's all going to be a little bits of different angles. So it's going to be a lot more natural when it falls and you can see where it's fallen. It'S just gives you that kind of softness and texture in there, and that is what makes extensions look realistic. So it's not sure thing. Oh just one length you have this nice beautiful movement in there again, you can go through and kind of spot treat any areas where you like. Oh no, it's too long long. You know so just go in making up any bits that you want. Thank you guys. So much for watching definitely check out the description box below there's links to all of the social media channels. Also the ears this will we website and all that good stuff is down there, so definitely go down there and check it out all right guys. I love you all and I'll see you the next video funny


Comments
M.: Been waiting for this video!!! I used Jade's latest wet cut for my own hair and it was amazing and I'm due to trim it tomorrow... now I can so my extensions as well :) ♡♡♡
Lacey Kozelouzek: This was the best video that I've seen yet! Thank you so much! I feel a lot more confident to do this to mine now haha.
craig robbins: Thank U !!!!!! You did a fantastic job showing how to make extensions look real! LOVED IT!!!!
Renee.Okayz: This helped me soooo much! Thank you!
Shilow Boven: this was an excellent video. you described it very good.
Corinna Thompson: You are adorable!!! Thanks for this amazing video
CallmeZ: AMAZING JOB!
Christina Ramos: Nice thank you
Ashley Wyatt: Those extensions are wayyyyy too warm
M F: You did a good job, but those extensions are the completely wrong shade of blonde sorry to say. Just being constructive
iamsleepy: gerfat vidoe cant wait to extend my hair xD
Silly Lily: ♡
Kristie Hhh: Why