Diy Clip In Hair Extensions
- Posted on 07 February, 2013
- Clip-in Hair Extensions
- By Anonymous
Easy.Inexpensive.DIY.Clip In Hair Extensions!
Hello loves, and welcome to my FIRST EVER youtube video (so please be kind)! I am a licensed cosmetologist who is obsessed with everything beauty and fashion related, so i am ready and excited to make many more videos sharing my techniques and opinions in hopes to help any viewers that may need or want it.
Please do not hesitate to ask any questions i did not answer in the video as well as give me possible ideas for future videos to come, and subscribe to my channel to help me grow:)
P.S. i swear im not ORANGE, bad lighting i guess.
[FOLLOW ME!]
-Twitter: http://www.twitter.com/DrewLMarshall
-Instagram: http://www.instagram.com/drewlydiamars...
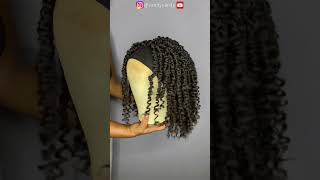
Hi everyone, this video is going to be on clip in hair extensions and how you can make your own um. I just recently made no kitty, oh gosh. No. I just recently made my own clip and hair extensions on the extensions that i have in my hair. Right now i made myself um. I liked it a lot. I thought that it was fun. I thought that it was really easy and fairly inexpensive in comparison to just going out and buying extensions with the clips already sewn on them and um. I also really like that, because i made them. I had full control over how thick they were, how thin they were, how tight they were sewn together. How tight the clips were sewn on so um. When you do it yourself, you really have full control over how it's done and um. Therefore, you'll know how long they're gon na last and if something were to come loose or you know something were to go wrong with one of them um. You will then know how to fix it accordingly, so i really like that as well um. So if you guys would like to learn how to make your own clip in hair extensions as well um just keep watching thanks guys, just really quick before we get started, i am going to go over the supplies that we will be using. So we have a spool of thread. Um, any spool of thread will work. I got mine from hobby lobby just make sure that the color of your thread matches the color of your hair hair clips um. You can find these at any beauty supply. I got mine from sally's in a box of 14 for around five dollars again, just make sure that the color of the clip matches the color of your hair and that the size is going to work best with the texture of your hair, a needle any sewing Or hair needle will work. I got this from the dollar store in a standard sewing kit just make sure that the needle is not going to be too thick to push through your weft of hair scissors and your hair and again any hair will work. Just your favorite hair, whatever you're most comfortable with using whatever, will give you um the desired. Look that you're going for this hair is 100 human hair 18 inches long in color 1b, which is the darkest um that it can go. Okay, the first step we are going to be taking is to measure our extensions, and the reason behind this is so that our new extensions can blend in seamlessly with our natural hair so to get started. First, we are going to take our weft of hair and starting at the bottom of our head. Always you always want to stop stop. No. You always want to start at the bottom of your head working your way up. We are going to take the weft of hair and place it on one side of our head, stretching it tauntly to the other side of our head and the reason why i say you want to stretch it. Taunt is so that um, your extension, is not loose. It'S not going to sag at all. Therefore, you're not going to be able to see them through your natural hair and they won't get caught on anything and pull out. So from one side of your head to the other hold firmly and place your fingers at the ends of each side like so, and that will be your perfect measurement now from here, you can, like, i said one of the great advantages of making your own hair Extensions is that you can customize them. We can make them as thick or as thin as we would like. So if you would just like one single track, which is going to be a little bit thinner, you can go ahead and cut right here, but, like myself, i like them to be a little bit fuller. I am going to go ahead and double it to make it a little bit fuller. So to do so, you just take the measurement that we had and fold it over perfectly, so one extension is actually going to be doubled and then you could even take it further and triple it by folding it over once more. If you would like, which is going to make it really thick so like i was saying single single, you would just cut right now, double fold it over perfectly and then cut it off from the rest of the weft and triple fold it over once more and Then cut it off from the rest of the weft so, like i said, always work your way from the bottom up. Um, your head obviously gets wider as you work your way up, so an extension made for the bottom of your hair should never be put in the middle or at the top. Um hold tauntly so that you get a nice snug fit and it's not going to be visible through your natural hair. Nor will it be able to tug out that would be terrible and um make it. The fullness that you desire so single double trouble, and it is as easy as that sorry loves last minute, when i was going over william and i's editing, we realized that i forgot a whole slide. So at this point you are going to take your double or tripled, track and sew it together, and you can keep watching to see how sorry guys yay guys we are finally, at the last step of sewing our clip in extensions together so yeah. This is the last step after you have sewed your double track together or not whether you kept it single or we did the last step, sewed the double track together. It is time to sew the clips on to your extension, so we are going to use the lock stitch method. Like i showed you before, um you are going to put the front side of the clip, which is the side of the clip with the rubber in front. This is the front of the clip and the back of the clip with just the prongs visible. We are going to take the front of the clip and butt it up to one side of your hair and it doesn't matter which side it all looks the same. That'S completely up to you so take the side with the rubber and butt it up against the hair, and we are going to be sewing. The five small holes at the very top, not the gold hole - that's going to be too far down, but the five small holes is where we are going to be sewing so, like i said, take the front of the clip and butt it up against either side Of your hair, and when you do it correctly, it will snap out and the prongs will pop up so that you could secure it onto your hair, as in you were putting it on. So this is correct, and this is not correct. Obviously so get your clip situated correctly and we are going to take our threaded needle again, assuming everyone knows how to thread a needle and let's see if i can stick your needle through the first hole. If i can get it pull the thread through and the clip is going to wiggle around until you lock stitch it a few times, stick the needle through again that creates the loop for your lock stitch, put the needle through the loop pull it through, and now You have lock stitched it, so it should stay in place a little bit better and you are going to do this to each one of the holes until you can't do it anymore. Um the holes are pretty small, so the thread will eventually get too thick and you won't be able to sew anymore, so do each of the five holes until you can't do it anymore. So, like i said, take the loop that you have created put the needle through the loop and pull firmly stick the needle through the first hole, creating your loop stick, the needle through the loop and pull firmly and then once your thread gets too thick that you Cannot continue to sew anymore, you will lock stitch it. One more time, go ahead and cut your thread off re-thread your needle. If you need to and then continue on to the rest of the five holes, and then this is what it will look like and one more thing that i wanted to tell you. Each extension should at least have two clips one clip on each side so like so i have a clip on this side and then for this one. I would put a clip on this side because um again going back to the beginning, this will be an extension for the bottom portion of my head. Um. Longer extensions for the top of your head will have three clips clip on each side and a clip to secure it in the back. If you choose to do it that way, you could just do three clips. You could do three clips on each side. You could do clips across the whole thing, but each extension should have two clips to secure them properly. Um, if you measure them the correct way, you know bottom to top and then sides, if you prefer them. Each extension should have two clips to assure that they're not going to slip out they're, not gon na you know be able to tug out if you get caught on something so yeah that is it. We measured. We sewed the extensions together if you chose to double or triple them and we lock stitched the clips on in all five small holes, so that is it um do that for every one of the extensions that you have measured, follow these steps and i guarantee that They should come out perfect um. This is my first video of hopefully many more to come, so i hope that i could help. I hope that you enjoyed it and i hope that you love your new clip in extensions. If i can answer any more questions or help you in any way that i forgot to include in the video, please do not hesitate to comment um. Thank you. So much for watching happy sewing and i hope you love your new clip and extensions bye, guys.


Comments
BeautyByDrew00: Thank you so much for the suggestion of weave thread! I am embarrassed to be a licensed cosmetologist and haven't heard of this myself. I can't wait to try it
BeautyByDrew00: Yes, generally you can use bobbi pins and hair clips when working with hair on a weft. This method works great while trying to achieve certain specific hairstyles using extensions like a pony tail and or bun. As far as simply securing each track in to wear down as I show in this video I do not know clips and bobbi pins to be the best or most effective way, yet very quick and easy and will hold for short inactive periods of time.
desiree ledesma: Love the vid :) and for those who are looking for a lil cheaper price i bought my 18" hair at Sally's and also purchased the clips,needle,and extension thread for about 75 dollars it's cheaper that what most places cost :) hope it helps and yes mines real human hair I do everything with it :)
spw143: The best thread is that sew in weave thread..its thicker and lasts longer than traditional thread..you can get it at Sallys now also at most hair shops.
BeautyByDrew00: To answer the question about hair not already on the weft, I find this hair best for making single fusion extensions. Although I do not have a video on fusion extensions I have applied them into my hair and really enjoyed them.
BeautyByDrew00: Thanks so much for the positive feedback as well as the info about your hair from Sally's. I have also looked into hair from Sally's and it was much much more, idk possibly just a difference in location.
Milca Rodriguez: I love your hair!!!!
BeautyByDrew00: My hair is just from a local family owned beauty supply. Of course I forget what brand it is (SORRY!), but it was about $100 per pack and I used two
Kathy Coleman: What was the brand of hair that you used for your Extensions?
Devin Reis: What if the hair has no weft band?
Pola Aicee: is it ok tto use bobbi pin/ hair pin?
ellen cameron: Where can I find the hair? (I'm in the uk)
cindy medrano: Where did you get your hair from?
BeautyByDrew00: I'm not certain, but I believe the brand I worked with this time around was called "Milky Way". I know it's not near
Cecelia: Where are those extensions without clips from? Everywhere i look they already have clips.
Angelica light: What was the name of the hair you used?
BeautyByDrew00: Actually for 18 inch 100% human hair on a weft, $100 is right around the general high price. Now of course if you were to purchase longer or not just on the weft your price would increase. I was simply giving information to those interested, not throwing numbers around to debate the difference between my idea of expensive from yours. Ok?......Thanks!
Milca Rodriguez: Do you have a Instagram??? :)
BeautyByDrew00: Nearly the best name in human hair, but certainly not the worst either. It is roughly $100 a pack and if taken care of correctly will keep quality and look great
BeautyByDrew00: My hair is just from one
BeautyByDrew00: Actually for 18 inch, 100% real human r
Bell Marino: i thought u said in expensive.... $100 ok ....
Tanisha: Are you from Chicago
BeautyByDrew00: No, I am not from Chicago