Sleek Ombre Braid Ponytail Using Braiding Hair | Beginner Friendly
- Posted on 25 September, 2021
- Ponytail Hairstyles
- By Anonymous
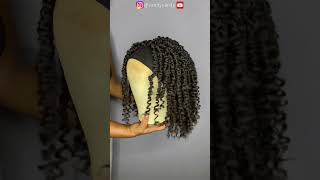
This is how I do this #Sleek #slickback Sade-Inspired #braidponytail using braiding hair
Products Used:
1 Pack Queen Bee Braiding Hair
2 ponytail holders
Got 2B Glued Hairspray/
Mane Choice Hair Gel
I sealed the braid using hot water
Thumbs up for more hair tutorials!
LIKE COMMENT SUBSCRIBE
Welcome back so in this video, i'm going to show you how i achieve my sade inspired waist length, middle part, braid and, of course, who doesn't love, shot a like come on now, so the hair that i use comes pre-stretched already, which just means that the ends Are not blunt or tapered so um that just gives a more natural look. In my opinion, i do have a hard time with braiding hair because it can get tangled very easily. So i just when i remove packaging, i cut um. So first thing my hair is already like prepared. I am just putting more gel in it, so it secures the braid a lot better. So all you need to do really to secure the hair into yours. You take your two scrunchies and situate the hair so that it is longer in the front and shorter in the back, and you see the reason why you want to do. That is because it's really rough trying to get this through the ponytail, and you want to try to limit how much you have to do. Okay, so i'm just showing you this process of trying to secure it while the other half of the hair is i'm holding it with my, i think my legs my knees, so this is what it looks like after you secure that to cover your hair. Now you just drop it down, um fill out for the lumps and everything, so i'm just doing that right now. So this piece right here i am separating it because i am going to use it to wrap around my braid when it's all finished and it's going to be super cute um. So just make sure you do that and also covers the rubber band. So um make sure you do that when you are setting up your braid, so you can see me being very gentle separating this hair because i do not want any tangles. It is like the scariest thing ever when you have this huge bird's nest at the end of this beautiful braid, you did so um. You can see me trying to start the braid. I do have to admit that i had to fix my braid off to the side because i didn't make sure my hair, my real hair was wrapped up in the braid. Well enough, so i did have those pieces out, so i fixed it off camera, but you're probably going to see them in this next scene, but that hair that i showed you um that i had to separate now. I'M wrapping that around my rubber band and then i'm taking my got to be just to secure it make sure it stays okay and then that's pretty much all you have to do. You just need to make sure um, you don't have any pieces out and then have your hot water ready, because you're going to seal your ends and also it just makes the hair it just makes the braid look a lot nicer when you, when you dip them, Um see i like a little curl at the end, so um i'm showing you how to do it without the flexi rod. But this is what i ended up doing for my own braid. But then you want to be very careful because it is super hot, so make sure you get um a couple towels um just because it is going to drip and it's boiling hot. So that is pretty much it all right. Well, hopefully you enjoyed and if you try this out please let me know in the comments and don't forget to like comment subscribe. It does help out the channel and i will see you next time. You


Comments
Johnice Edwards: Love this it turned out so cute! Ty for sharing