Extreme Hold... Pt.1 How To Glue Wig Down No Mess! Long Hold! Waterproof & Sweatproof Wig Install
- Posted on 17 February, 2023
- Ponytail Hairstyles
- By Anonymous
FINALLY!! Let's do a LONG HOLD glue wig install that is supposed to be sweat proof, and WATERPROOF! This is part 1. Part 2 https://youtu.be/G-wTy1mbK7g
WIG LINK : https://ronniehair.com/products/new-su...
DISCOUNT: marie
LENGTH: 22 inch ( layered by me)
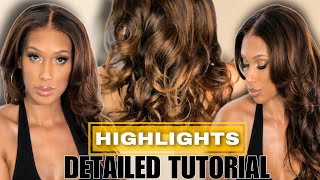
Color: Dark Brown ( Highlights added by me)
DENSITY: 150
✨ SHOP WIG DEALER PRODUCTS: https://bit.ly/3lnAW9w
MARIE10 (For 10%off) at checkout
SHOP EVERY TOOL AND PRODUCT I USE: https://www.amazon.com/shop/msprecious...
Every product and tool I use will be in this link.
✦ ✦✦✦✦✦✦✦✦ HELPFUL INSTALL VIDEOS ✦✦✦✦✦✦✦✦✦✦✦
HOW TO CUT EAR TAB ON WIGS https://bit.ly/3AkkyL1
HOW TO CUSTOMIZE A LACE WIG https://bit.ly/3QrGuKM
CUTTING EAR TAB AREA 360 LACE WIG https://bit.ly/3w8zYAp
HOW TO MEASURE WIG TO FIT HEAD https://bit.ly/3A41UXg
NO BABY HAIR BEGINNER WIG INSTALL https://bit.ly/3CdZLuX
TIPS FOR APPLYING WIG ON NATURAL HAIRLINE https://bit.ly/3CcyCZy
SECURE NO GLUE WIG INSTALL https://bit.ly/3c00y8e
8 TIPS TO MAKE YOUR WIG LOOK BETTER https://bit.ly/3w94quf
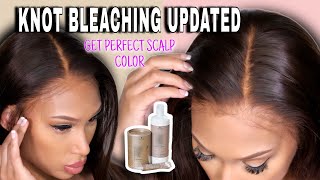
HOW TO BLEACH KNOTS ON A WIG https://bit.ly/3w7zASY
HOW TO REMOVE WIG & WASH PROPERLY https://bit.ly/3SWCLq8
HOW TO SEW FAKE SCALP MATERIAL https://bit.ly/3PP5MBH
✦✦✦✦✦✦✦✦✦✦✦✦✦✦✦✦✦✦✦✦✦✦✦✦✦✦✦✦✦✦✦✦✦✦✦✦✦✦✦✦✦✦
Get the SCALP Material:
Fake Scalp Material https://bit.ly/3mp7qwU
___________________
FOLLOW ME HERE:
♡ Tik Tok https://vm.tiktok.com/ZMRwbmjdu/
♡Instagram: https://www.instagram.com/mspreciousma...
♡My Website: https://mspreciousmarie.com/
SPONSORSHIP INQUIRES EMAIL: [email protected]
If you would like your product shared in my videos, email me for details.
TIMESTAMPS:
00:00 INTRO
00:25 Viewer Appreciation
00:54 Wig Essential Wig Install Kit
1:38 Lace wig Info
2:17 Wig Install With Glue
3:08 How To Use Waterproof wig glue
4:07 How Long To Tie Down Hairline
4:52 Hair Update and Styling
6:27 Hairline REVEAL
7:31 INSTALL REVIEW
8:23 WIG GLUE UPDATE #1
8:38 Sunlight Test
*Hair or products shared are my OWN personal and honest experience. This video may contain sponsored content and affiliate links which I get a small percentage that helps invest back in my channel to continue to bring great content! Thank you for being so supportive!*
I'M happy great man, I should be able to sweat and everything. Welcome back. What do you all think about the new intro, so today's video, I want to start off something different. I just want to acknowledge these comments that I get with such positive feedback. Thank you guys so much for continuing to show your love, and I just love you guys so much because y'all just keep me going again. If you have any questions concerns you can drop them below I'll either answer them in a video or directly and again I love you guys. Thank you for all of your support. Let'S Jump Right In I'm super excited about today's video because I am going to be sharing with you all a wig glue that is waterproof an actual glue, so it comes from wig dealer. This is the kit that I have it comes with this HD wig cap. That is great for the ball cap method. They give you a little pair of scissors to cut your legs. These scissors are actually really good and also a razor. Now I don't use razors to remove the lace, but if you do it's also in this kit um, they give you their Edge band. Basically, this kit has everything you need to lay and slay your wig, and it also comes with the hair glues on their website. The melting spray is one of them. The touch up. You all see me use this already in the video. I will pop that right here and today we are going to be using the extreme whole lace glue all right, so we're gon na do a reinstall. Today. Now this wig comes from Ronnie hair. It will be linked Below in the description box. I have colored this hair and I've highlighted it and did layers to it all that good stuff. The videos will also be um linked. I will link them in the pop-outs at the top of the screen. Now this has been my everyday wig, so I've washed this wig several times. As you see, I colored it. This is what the hairline and everything looked like. It still looks amazing. This is a 3D lace, frontal cap, so you get a lot of parting space in the front and of course you get that beautiful hairline. Now I'm putting a time stamp here, so you can see what time I am installing this wig, because over the next two days I will be updating on how well this glue held up. So I'm going to be wearing this wig for the next. You know couple: it was a few days for me three days for y'all um Zeus and get rid of like a little piece that I didn't cut correctly. These scissors are very good and again they can be found in that Wick kit that I showed you guys at the beginning. I will link this kit Below in the description box, along with the discount code that does work. I did get it to work for y'all um, so it works now all right, so the extreme whole lace glue is what I'm going to use to install today's wig and it's so simple to use. Once I apply the glue, I let it dry completely clear as clear as I can possibly get it to go, and I only use one layer and then I laid the lace down now. You can see right at the edge of the glue and Edge of the cap of the lace. It still has some white spots. I was a little bit worried about that, but I did not want. I mean you can really wait as long as you need to um for the wet glue it's not going to cure cure as fast as the adhesives will on the adhesive sprays. So you want it to be as clear as possible before you lay your lace down and I'm just taking this little spatula and pressing the lace making sure the edges of the laces in the glue. If you watched the video completely through today, I do have an update um what happened with this glue later on as my day progressed, so that will be later on in the video. If you keep on watching and remember, I'm coming back tomorrow and Sunday with updates on this wig adhesive and I may even water test it in the shower just to see how it holds up now, I am going to tie down a hairline and this time I'm Going to tie it down for an hour okay, so they do have an edge man in the kit. If you need one I'm using mine, because my sleigh band actually presses that hairline better. So I let that sit for at least one hour when it comes to wig glue. You definitely want to let the glue cure I'm going to talk about that in a second, but I do want to acknowledge that there was no instruction on really how to apply that wig glue. I have used wig glue with the white base before and it's almost the same as any other when it comes to application, so you just apply it and you let it dry until it's clear and then you press your lace but yeah. This wig is so pretty. I promise you all when I colored it, I feel like the hair became better now I did start out with the base color of natural Brown. This wig comes in natural, black or natural Brown, so it was a natural brown color and then I just added some highlights throughout this wig and over the past few weeks I've been wearing this wig like when I'm not filming. This is my go-to wig and it looks so good. I love the hair on it. The hairline is gorgeous. The cap is amazing, as far as The Parting, because you get so much parting space at that front, there's a huge parting, all the way to the center of your head. So if you are looking for a wig where you get more parting space around the front and sides, this wig is definitely that and of course I did bleach the knots. I do have an updated, not bleaching tutorial for this year. If you want to check that out, I will pop it out right here, also foreign foreign, okay, it's been about an hour, I'm gon na go ahead and remove this Edge band and give you guys my reaction to this hairline. I'M happy great. It looked good, though I want to see how it holds them, so it's supposed to be a waterproof blue man. I should be able to sweat and everything y'all. When I tell you how excited I was that there was no mess, there was no white residue. There was no hair that was stuck in a gooey gooey mess off top. The install was so simple and not messy. I absolutely loved it. When I took off the edge band and a lot of times, I don't like to use with glue because of the mess it makes. And if you make a mistake, then you have to reinstall clean all that glue off, and I was just excited that the headband wasn't stuck to it. Everything was just gorgeous so yeah as far as the install very simple that gets a definite 8 out of ten. Eight out of ten y'all, okay and as you can see, that hairline looks so good um and the whole feels comfortable and it just it's stuck like it's stuck. So I'm excited to update about the install and let you guys know how it held up through sweat. Like I said, I may do a shower test and show you all how it actually hold up in water because it is waterproof, so it says so I want to give you guys the full experience and this hair is absolutely gorgeous. I will link this wig Below in the description box. It'S a must-have if you are looking for a really pretty wig. So let's jump right into the update, and I will see you guys in my next video. So it's been a couple hours since I actually did the install this glue is super comfortable. I wasn't even going to come back and update to be honest, but I was like why not when I tell you all this glue feels so comfortable and I did the shine test. So I'm gon na insert right now like a clip right here, where you can see me um out in actual sunlight. The shine is not bad, and that is a plus that is a plus okay hold on um. What I plan on doing, what I'm gon na do is keep you all updated. Probably I'm gon na try my best today. If not today, you are going to get updates um for the next two days on this wig adhesive. Don'T plan on working out on today. I'M kind of tired, if I don't work out, I am going to water test this glue, maybe in a shower or something so not today, I want I want to give the glue at least 24 hours secure before I decide to put any type of moisture on The hairline understand with these wig glues, you have to give them time to cure before you just go out and wet them. Everything looks good um. If you have not seen my video on how I colored this hair and also layered it, I will pop it out for you right here. You can go check out that video and I also have a not bleaching tutorial, oh my hand hold on. So if you want to know how I bleach the knots to get them to look really good, definitely check out that video also. So I will see you guys later.
Comments
Graciously Blessed: Hi Ms. Precious Marie. I pray all is well. This presentation was great, as usual. Thank you. I look forward to seeing the next video, as you share updated details about this glue. May you and your family have a blessed evening.
Kay Mac: Thanks for the video, you did an amazing job on the cutting and color! I'm excited to try this glue! I've never used glue because I've heard horror stories, but I bought the kit, it was priced nice, but after I bought it they did say the lace cutting scissors may or may not be included depending on availability, I think that's wrong, but we shall see!
Tiara Bennett: Another simple yet Flawless Slay!! I look forward to the updates on how the glue holds up as well Do you think you would be able to do a video of you cleaning the glue off the lace?? I haven’t came across any recent or updated videos from other influencers on cleaning glue off lace, and was just wondering if there are any different/new techniques. God Bless always
Felicia Moss: I love the new presentation! ❤❤❤ Great job with the presentation of this wig glue and I love the style.
Vanessa Lawson: Ready to try it after you made it look so easy. Great demonstration video.
Karlene Dunkley: Yes! I really love that wig. Looking forward to the update!
Donna Wallace: I just got the gel and glue today! Thank you Marie
Nikki Harrison: Loving the new intro Wig dealer glue, spray and holding gel is EVERYTHING
Marjorie Karimi: Hi Marie! Looking forward to seeing the updates.
Beauty by Jay Morris: Gorgeous Marie, the hair glue held up really well, thanks for sharing
Jasmine W: Yes love intro, and hair looks good so does the glue install. SO, curious question why not 10 out of 10?
Jazmine Gardner: Hey I love the Into and you look so Beautiful as usual ♥️♥️♥️♥️
Esther Sowell: Perfect marie the hair is geourgeous ❣️❣️
Dee Mayes: Beautiful install. Presious how abo doing the updates as a tick tock video
Alisa Mitchell: BEAUTIFUL SLAY TO PERFECTION
Monebyrd: Thanks so much for sharing
Brown Cow: You are an excellent teacher. TYVM
Perry Rice: Wish I knew about this wig hair company before I bought my wig from OMG her hair. They have a 360 that I wanted that I could have used to put up in a high bun. ♀️
Ericka Bell: Again, thank you for trying out new products for us, however, I'm still waiting on you to do a wig giveaway
Crystal Amos: QUESTION WHAT IS THE DIFFERENCE BETWEEN THE KOREAN LACE AND SWISS LACE
Nikki Molly: Hello I love the new intro .
Alisa Mitchell: LOVE YOUR INTRO
Bargain Beauty: The new intro nice!!
fashun008: I love the new intro
tori c: ❤❤❤
Angelia Brown: You said the glue was 8 out of ten. Do you have a ten glue
Paricia Jones: ✅️✅️✅️✅️