Trending Claw Clip/Half Up Half Down Wig Install | Ft Nadula Hair | Reddish Brown Color
- Posted on 30 January, 2023
- HD Lace Wig
- By Anonymous
Thank you for watching!!! ❤️❤️❤️
•
If you enjoyed this video please Like, Comment, and Subscribe
•
Business inquiries: [email protected]
•
Follow my Instagrams!
Personal: https://instagram.com/aaicilaa?igshid=...=
MAKEUP Business: https://instagram.com/beatbylecey?igsh...=
LINK TO MUSIC USED
LINK TO HAIR USED⬇️
Nadula #33 Red Brown Auburn Human Hair Wig
www.nadula.com/?koc_share_key=jBwPvi
#nadulawig #nadulahair #nadula #wiginstall #wigtutorial #wigreview #transparentlace #hdlace #hdlacewig
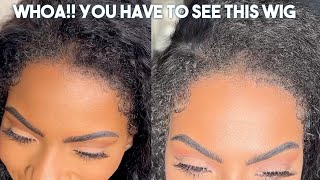
Tonight, hey y'all as y'all can see. This hair is from the Doula hair. This is the number 33 red Brown Auburn human hair wig. It is pre-plucked and it is a transparent lace. I really love that. I got a lot of goodies in this order. As y'all can see. I got press on nails that second thing was a magnet. Those are lashes, an elastic band, cheetah print two pack of wig cap, which I did use in the video, and this is a makeup brush, but you can use it to. I guess, put the makeup on your wig or wig cap. If you want that's what I did now, let's get into the wig. This is also a water wave wig, which I really liked. I like the curls, the wig was bouncy. I did bleach the wig off camera. I did not pluck it. I plucked it a little bit on my head, which y'all will see in the video here. Y'All can see that that was all the shedding that I got from washing it out after bleaching it, and I will say that the wig does shed a lot. So I'm really not fond of that. Now, let's get into this install first, I'm gon na go down with my Erica J hold me down adhesive skin guard that just protects your skin, slash scalp from the glue that we're going to be using on our heads, because I do use glue glue like I'm. Not like a glueless type of girl, I need that to stick on for a few days now. Okay, after that, I did put a little got to be on like the edges, because I guess the liquid base in that product kind of lifted up the Bold cap a little bit which which, as you can see, I did that off camera. But if y'all want a tutorial with the full, bold cap method, let me know, because I got y'all and if y'all see me laughing and looking to the side throughout this video. Don'T even mind that, because I was literally playing YouTube videos and cackling, because I was playing like funny: videos, okay, yeah foreign, so to lay my wig down, I like to cut the lace into a few sections, because that just gives me a bit more control when It comes to like actually pressing the lace in and for the Melt and everything versus just having one large piece. So that's what y'all see me doing here now I am going in with my Erica J hold me down. Adhesive yo, like me, fighting this Lou Loki saved my life because I had got my hair done recently and I'm pretty sure the hair stylist used this glue. This glue is the truth. This is like the up the uppity uppity type of glue. This is not your regular beauty supply store glue. If you want your wig to stay down, it's going to stay down, and this is in the watermelon scent. So I really like that, because it smelled really good and it is waterproof as well great purchase now y'all see how I'm putting down my glue here. I kind of go in a zigzag motions when I actually apply the glue and then I use my rat tail clone to just you know, smoothen that out and I did use three layers so between each layer that you put down. You definitely want to make sure that the glue is clear before you add another layer, and you want to also make sure that the glue is clear before you decide to press the lace into your scalp. Slash head, slash whatever y'all know what I mean foreign. I also want to mention that off camera I did tint my wig and Lace cap, but not with like an actual lace. Tint with a cream foundation. Type of situation got it from the beauty supply store. So if y'all see any little circle cream Foundations at mattress skin tone just use a makeup brush apply that to your lace lightly, don't OD into your wig cap and just so it could look more like scalp right. So, to cut my lace, I'm going in with a razor and you can find this at the beauty supply store as well or any like drugstore type of situation, the way that it cuts the lace like it's not in a straight line, so that you know you Don'T see that straight line, you want it to be like a little zigzaggy, a little Jagged so that it could blend better into your skin and further look like scalp slash hairline, if that makes sense, yeah everybody looking for me for any lace that you don't fully Get when you do the initial glue down as y'all can see here. I just take a little bit of glue. Add it to the end of my rat tail comb and just put it under those little lifted pieces. Let it dry a little bit. I probably put about two layers and press it in with the actual comb part that way everything is laid and slayed foreign. I am going in and doing a middle part because, as y'all can see from the title and thumbnail we're doing the viral claw, clip half up half down Style, and I don't know how viral it is because I really feel like this is a style that we Just took from the people in the 90s and 2000s, but whatever so I'm going in with my hot comb just to make everything as flat as possible and then shortly very soon. Y'All are going to see me separate the hair in the front. To do my baby hairs, I'm going in and I'm plucking that middle part a little bit just so it could look. You know a bit more realistic and less Wiggy and y'all gon na see how everything plays out foreign. I like to use the hot comb to separate the baby hairs from like the rest of the hairline. It just makes everything flatter and easier to work with, and then I go in and I start plugging that area as well. For some reason, I, like plucking, the wig like after it's already on my head, because it just gives me a better idea on what I'm actually really looking like. I really hate plug-in wigs off camera. I really don't even really do that. I always go for like the pre-plugged wigs and do what I need to do after the fact. So I'm just going to do that around the circumference. I do four baby hairs and I'm a dramatic baby hair type of girl, thick baby hair type of girl. So you make your baby hairs as thick or thin as you would like, and you just pluck until you know you got ta look at it see if it looks realistic or not and take it from there foreign. I did do the rest of the parting off camera. Sorry, just because I was afraid I was going to run out of storage, but, as y'all can see, I have a part in the middle. I have a part right above that separates the back that I'm hot combing right now, that will be the half up, half down part and y'all, see what I will do next with those little flaps that are out here in the front so hold everything down. I go back and forth between the god to be spray and I have the Eco Style believe it is, or Edge booster wax. Stick any wax, stick will work, any holding spray will work just to hold everything into place and you use the hot comb just to help further mold everything where you want it to go foreign foreign. Now, I'm going in with the ebony New York, lace, adhesive spray. That'S just to further help with the meltage of your lace. That'S just to make sure everything is further secured, especially on the hairline. I picked this up from somebody else's wig tutorial video started doing it and I like it, and this product smells good too. So definitely jacking, it definitely jacking it. Next, I'm going in with the handy dandy razor to shorten my baby hairs. Like I told y'all, I am a dramatic baby hair girl, so I go back and forth on and off camera with, like shortening it a little bit more and I make it the perfect length that works for me and you know yeah I'll make it the perfect Length that works for y'all, if you like, very small baby hairs, not doing too much very subtle, do that. But if you like The Dramatics, do that too do whatever float to your bone foreign? Now, I'm about to go in with this Spritz to mold slash shape of my baby hairs. I sprayed like a little bit on my finger and then just apply it to the hair. Like that and then you know, y'all see the baby hairs are babying foreign. I go in with my Nairobi foaming mousse. This is this: is the girl's mousse? If you don't got this mousse? I don't know what you're doing like this is like the best moves on the market, and I just use that to further help shaping my baby hairs and mold them into place come on playing games foreign, some please - and this is basically the finished - look y'all. If you made it to the end, thank you for watching, I hope you enjoyed. I hope you learned something new about how to install your wig and the link to this wig that I bought will be in the description box. See you on the next video later you're, not ready.


Comments
Big nela: Looking so pretty mamita
Jacksongottfans:
Big nela: Earlyyyyy❤❤❤❤
Mostknowndarrielle🍭: First