How To Make A U Part Wignadula Hairdanyiello
- Posted on 04 January, 2022
- U Part Wig
- By Anonymous
hey loves, welcome to my channel! leave me some comments to let me know how you like the video! (I reply back lol)
This video was not sponsored. All items were paid for with my own mula.
LET’S GET SOCIAL
snapchat: @dan.yiello
twitter: @danyiello
instagram: @dan.yiello
INTRO/OUTRO SONG: https://soundcloud.app.goo.gl/1G1mj6S...
MUSIC BY SOUTHSTREET24-MEDIA
I DO NOT OWN ANY RIGHTS TO THIS MUSIC.
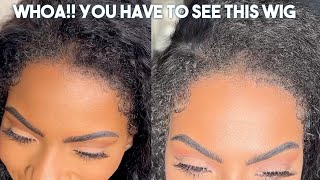
When i have you on my mind, baby, hey y'all, welcome back to my channel. So today i'm going to be showing y'all how to make this u-part wig and what a u-part wig is. It'S basically a wig with no lace, just bundles all formed in a u-shape. Giving you a leave out just like we used to do back in the day with the sew-ins. So that's what a u-part wig is. I took my metallic sharpie. I just got it from walmart for a couple of dollars. I took it and started tracing out a u-shape onto the dome cap. I'M gon na need this for later. The hair that is going to be using to make this wig is from the doula hair, it's 16 inches all three bundles and it's their body waves. The key to this is really simple: you just sew from side to side in a u-shape until you get all the way to the top. You do the same thing every row, every time and you'll see um foreign. This is one bundle completely sewn in me. So two, this is two bundles completely sewn in now that i've gotten to the top of my wig, i'm just going to measure a piece out, cut it and sew it around that line so that i can close off my wig me. You told me these, oh after i take the wig off the mannequin head, i'm going to go ahead and cut out that black piece in the middle of the wig and i'm going to put my clips on there, which you'll see in a second. Oh. It is now time for the installation process, which is really really easy, and i'm just going to start out with my hair being blow dry. Your hair does not have to be blow dry promise. Your hair does not have to be blow dry. It works either way. I'M just going to take my comb and create a u shape with my part and section off my hair, the rest of my hair for braiding. This little piece right here that you see me section it off. It'S also going to be a part of the leave out, just leave it out and you'll come back to it later. I'M now just part of my hair for cornrows, which i'm just gon na do all around my head. All around the u-shape is really easy. Really simple: i connected the last braid into the next braid halfway through and you'll. Just see me do this here is after i finish, braiding all of my hair and my leave out is left out here. Is the wig already curled in style, ready for me to put on i'm just going to open those clips and clip around that u-shape? Is i'm now going to take my comb and just comb over the leave out to conceal the wig and then i'm going to style my own hair, that is left out with a flat iron? I did mine with the flat iron, and this is the final look very natural, very, very natural it blended. So well with my hair, i love this hair. I also have a review coming up so be on the lookout for that as well, but this is how the hair turned out. I love it. I love it. Let me know what y'all think in the comments. Thank you guys so much for watching my video. If you're not already subscribed, go ahead and hit that subscribe button for me and go ahead and follow me on all of my social media platforms, it will be in the description box and i will see y'all in the next video. I just need


Comments
Shoney: Thanks for the video. It’s been a while since I have made a wig.
Elvina Williams: Thee best straight forward tutorial ❤you have helped me so much princess thankyou x